Bronze Supporter
- Messages
- 8,632
- Reactions
- 12,878
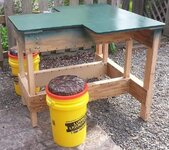
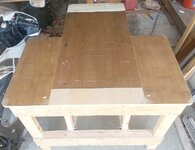
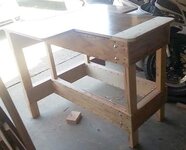
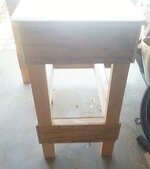
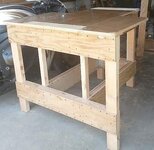
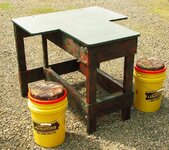
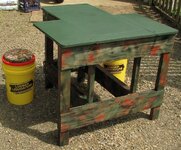
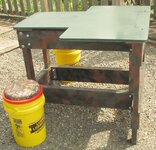
SO finally my new shooting bench is basically finished I still have 8 threaded inserts to put in (I'll do that when I take it apart to paint it since they have to go under the runners) Thinking about painting it Hammerite Green with a multi...color graffiti camo stand. I can use up a 1/2 dozen of the 30-40 cans of spray paint I got taking up space. The top fits between the two sections that are light colored and when lifted off folds up smaller. The base comes apart into 6 pieces and stacks flat. Its pretty heavy but each section is not bad at all. Should last a very long time. I'll do better photos when I get it painted and its ready to use.
Oh I should say this. All the material in this bench save a few screws and the bolts holding it together were already piled up around here. The stained parts of the top used to be the ugly cabinet doors in the kitchen when we bought the house. The piece at the back is left over Poplar from the Bathroom remodel, And the piece of 3/4" plywood at the front used to be part of a Drafting table I made years ago and ran out of room for 5 years ago. The 1/2" plywood from the base was bought to provide a base for a couple weird angled places near the dormer when I put up hardie plank. The 2X4 stuff was left over from some work building storage racks in the store room.
Its so over engineered and over built I think I could break dance on it while someone shot off the other side (and boy would that not be a pretty sight LOL)


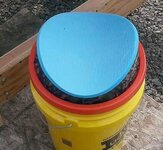
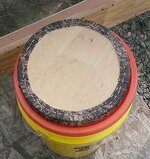
So today I stopped by Lumber Liquidators and bought a pair of 6 gallon plastic buckets to make the seats for this bench out of. Of course they didn't come with lids so I swung by Home Depot and got a pair of their plastic bucket lids. Checked High School Pharmacy here in town and they have real tree of the Old US military Woodland pattern fabric for $10 a yard. So I'll cut a couple of plywood circles to fit into the recesses on the lids and then stack about 4 layers of Ensolite sleeping pad foam on top and cover with the camo fabric for the actual seats. Save myself some money and get them just the way I want. Compared to store bought seats. The buckets will be used to store all the sand bags and wood blocks to hold the rifles at the correct angle. One of them I think I'll store the rabbit butchering stuff. Or maybe the ammo and some other stuff. Thinking about covering the Yellow buckets with camo Duct tape but that could get expensive so I think I will try scuffing the plastic up with fine sandpaper then camo paint. This is turning into quite the project.


Oh I should say this. All the material in this bench save a few screws and the bolts holding it together were already piled up around here. The stained parts of the top used to be the ugly cabinet doors in the kitchen when we bought the house. The piece at the back is left over Poplar from the Bathroom remodel, And the piece of 3/4" plywood at the front used to be part of a Drafting table I made years ago and ran out of room for 5 years ago. The 1/2" plywood from the base was bought to provide a base for a couple weird angled places near the dormer when I put up hardie plank. The 2X4 stuff was left over from some work building storage racks in the store room.
Its so over engineered and over built I think I could break dance on it while someone shot off the other side (and boy would that not be a pretty sight LOL)
So today I stopped by Lumber Liquidators and bought a pair of 6 gallon plastic buckets to make the seats for this bench out of. Of course they didn't come with lids so I swung by Home Depot and got a pair of their plastic bucket lids. Checked High School Pharmacy here in town and they have real tree of the Old US military Woodland pattern fabric for $10 a yard. So I'll cut a couple of plywood circles to fit into the recesses on the lids and then stack about 4 layers of Ensolite sleeping pad foam on top and cover with the camo fabric for the actual seats. Save myself some money and get them just the way I want. Compared to store bought seats. The buckets will be used to store all the sand bags and wood blocks to hold the rifles at the correct angle. One of them I think I'll store the rabbit butchering stuff. Or maybe the ammo and some other stuff. Thinking about covering the Yellow buckets with camo Duct tape but that could get expensive so I think I will try scuffing the plastic up with fine sandpaper then camo paint. This is turning into quite the project.
Last Edited:


