JavaScript is disabled
Our website requires JavaScript to function properly. For a better experience, please enable JavaScript in your browser settings before proceeding.
Messages
4,996
Reactions
2,279
I posted this on another forum and have had a couple requests to post it here due to people having trouble viewing it there. I thought I posted it here too but I guess I did not since I cannot find it anywhere. I guess my memory is playing tricks on me or my search function is screwy. If it turns out it is already here we can always delete it.

It will seem a little odd since there is a different post for different stages. Even though the project is already finished it will read as if I am posting progress reports as I go. That is kind of necessary to maintain all the info so please bear with me. I am also not editing the content so there will be a few cases where I use an incorrect term or two or where I mislabel a part. The thread really does answer a lot of the questions I get asked each week by board members regarding gun refinishing so it is a pretty good resource. :)

The progress reports will begin in the next post.

The tools used throughout the project are wet dry sandpaper (100, 300, and 600 grit), a vise, and a $9 siphon feed sandblaster I picked up at Home Depot.
 
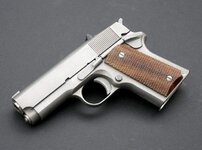
Here are the before pics of the .45acp Detonics MKVI I picked up today.

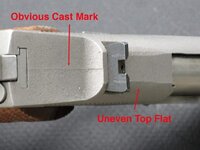
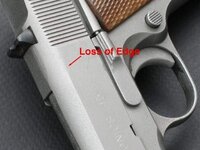
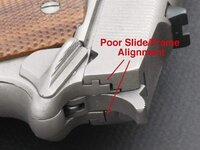
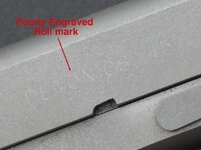
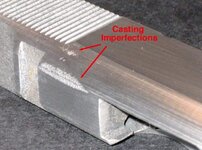
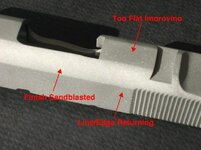
The slide has some serious cosmetic issues I need to address. The edge has been lost (rounded over) in a couple places, the top flat is machined unevenly, there are some obvious casting marks/imperfection, the rollmark is very cheap looking, and the rear slide alignment is not the greatest. I also hate the "rough finish" the gun came with from the factory.

I intend to refinish the entire slide, give the entire gun a satin beadblast finish similar to an Ed Brown Kobra Carry, and then have the rollmark re-engraved much more professionally. I might even try to adjust the slide alignment a bit.

Now to see which of those goals I can actually accomplish and which I cannot. :)


gun.jpg

castline.jpg

damage.jpg

slidefit.jpg

rollmark.jpg
 
Last edited by a moderator:
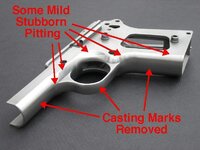
Some minor issues I have experienced so far are that the rough casting process has left a pretty uneven surface. The refinishing of the slide is going to be harder than I thought since the casting process has left some pretty rough voids. I have sanded so much that my fingers are raw already.


pitts.jpg
 
Last edited by a moderator:
Making a litte progress:

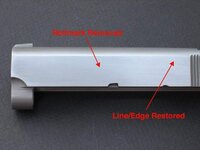
I sanded off the last of the rough finish then sandblasted the slide. The rolled edge is becoming and edge again, the top flat is much improved so far, and the cast lines are disappearing. The rollmark is also completely gone. :)

Working1.jpg
 
A little more progress:

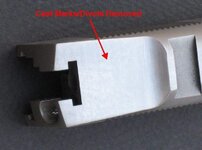
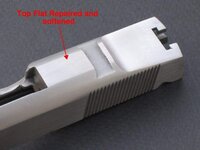
The slide is almost done. I have reshaped the top flat, restored the lost edge, taken out the casting marks, and taken out the pits. I then softened all the hard lines and edges to give it a softer and more finished appearance. Now I just have to bead blast it and have it engraved. I need to start on the frame tomorrow. :)


Castlines.jpg

RMremoved.jpg

toprepaired.jpg
 
Last edited by a moderator:
I finished the slide:

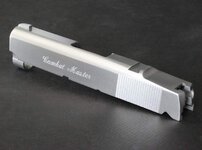
I fixed all the imperfections and then gave it a good bead blasting before having the model name lightly engraved onto the slide. It is not the worlds best engraving job since I had to have it done at the mall if I did not want to wait for 3 months. It does not look bad in person at all. It is very subtle and shallow enough that I could remove it if I ever decided to do so....but like I said, it looks pretty good. Especially for $12 total.


FinishedSlide.jpg
 
Last edited by a moderator:
Time to take on the frame:

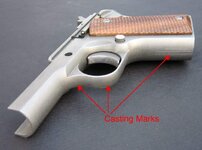
Hopefully I will be able to at least get a small start on it tonight. It will not require as much reshaping as the slide but it has it's own challenges. The casting marks are very severe and the finish is very rough. I am going to be sanding until I lose the feeling in my fingers. :)


frame.jpg
 
Last edited by a moderator:
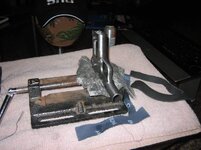
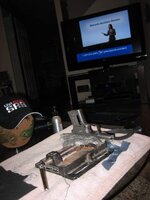
I got started on the frame:

The casting marks are coming out much easier on the frame since I am not having to do and reshaping. It really helps with the hours of repetitious sanding to set yourself up in front of the television.


Vise1.jpg

Vise2.jpg
 
Last edited by a moderator:
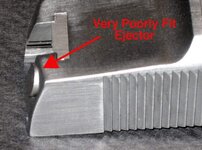
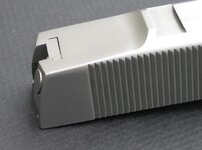
Tackling the ejector:

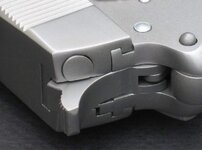
I filed the extractor down a bit to make it more flush with the rear of the gun's slide. It is not perfect but it is a whole lot better. It is actually almost perfectly flush now. The pic seems to exaggerate the difference a tiny bit because of the shadow.


BadEjector.jpg

BetterEjector.jpg
 
Last edited by a moderator:
My newly refinished Detonics Combat Master MC1:

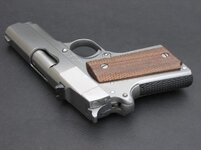
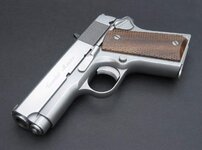
I took some quick pics of my newly refinished Combat Master MC1 today in the early light. The light was a bit harsh but the pics are good enough to give you the idea. I filed off all the casting marks, sanded out the rough surface/pits, softened the edges, flushed the extractor and ejector, flushed out the slide alignment, and gave the gun a nice satin/pearl-like bead blasted finish.

CM1-2.jpg

CM1-1.jpg
 
Last edited by a moderator:
I came across this thread again and remembered it from years ago. I'd sure love to find a 1911 like this and acquire these skills :)
 

Upcoming Events

Centralia Gun Show
Centralia, WA
Klamath Falls gun show
Klamath Falls, OR
Oregon Arms Collectors April 2024 Gun Show
Portland, OR
Albany Gun Show
Albany, OR

New Resource Reviews

New Classified Ads

Back Top