JavaScript is disabled
Our website requires JavaScript to function properly. For a better experience, please enable JavaScript in your browser settings before proceeding.
I also have a strong preference to an A5 buffer system and mid-length gas system on 16" barrel with a good port size of 0.076. That combination make an amazing smooth shooting machine.
That is some good info to have there my friend. Really appreciate all the advice and everything. Looks like tomorrow I start with my Barrel and whatever else I can acquire. In my hunting.
 
A good set of roll pin holders/starters along with proper roll punches is key to hassle free assembly and no "dummy" scratches or mushroomed pins. The cheap ones are junk and will bend/break easy. You can get by without the special bolt catch pin punch, just use lots of tape. I rarely use my brass punches, but do so for removing trigger/hammer pins.

Be extra careful installing trigger guard pin, those aluminum "ears" on the lower can snap, use a block to support them. The pivot pin can be tricky, they make a tool but watching an online video will show you how simple it can be. I have lost a few detent pins, they will disappear when spring launched across the room.

Make sure you install the hammer spring correctly, it can easily be reversed. There are plenty of pictures/videos online as a resource.

Remember quality components are worth their weight in gold, but that doesn't mean you can't skimp in certain areas and still have a good rifle. Like others above have stated barrel and bolt carrier group is most important.
 
Be extra careful installing trigger guard pin, those aluminum "ears" on the lower can snap, use a block to support them.

Good reminder, but you don't need the hockey puck support things if you just install the grip before installing the trigger guard roll pin. Typically it is the bottom ear that snaps off from rolling the the lower over it, with the grip in place it prevents the roll over.
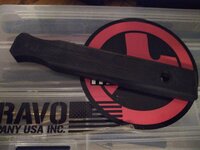
 
Good reminder, but you don't need the hockey puck support things if you just install the grip before installing the trigger guard roll pin. Typically it is the bottom ear that snaps off from rolling the the lower over it, with the grip in place it prevents the roll over.

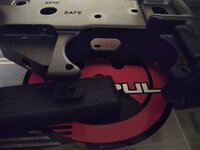
A buddy of mine made me this out of a piece of scrap wood just for that purpose, it works very well:
IMG_20200424_004115.jpg
IMG_20200424_004140.jpg
 
Just get this

 
There are two things I can think of that I don't recall seeing mentioned.

First, rather than a hammer and punch, I use a pair of Knipex pliers for doing the rollpins. They're an interesting lever design that lets the smooth jaws close like a vice. I think I have the 12" but the 10" should work just the same. Little expensive, but I've used mine for a number of other things.
https://www.amazon.com/dp/B000X4OG94

Here's a video of a guy using them. He's a little long winded but should give you the idea:

The second thing that I've always heard is that most lowers are transferred as "other" rather than "rifle" or "pistol" at the FFL, which is the most flexible option since you're not locked into one or the other. If you first build the lower as a pistol, you can build it into a rifle later without issue. However, if you first build it as a rifle, it is my understanding that you technically cannot build it into a pistol later. At least where I live, there is no requirement to register it as built a specific way, but for the sake of being legal, I build all my lowers as pistols first. The rules are wacky, I know. If you decide to go down the pistol path instead, there are a few other rules about fore grips and overall length you have to watch out for.

Good luck! Watch multiple build videos, take your time, go slow, and get the right tools and it'll be a breeze.
 
Funny story about the pliers trick. It works unless your tape sucks and you slip. Haha, big oops. Ask me how I know? First lower I built had some "character". However done the proper way like that video, it works extremely well. You will have to use a punch to center the pin after but all is good.
 
I tend to put the slightest crimp on the leading end of the rollpin. Just enough to get it sitting in the hole before crimping with pliers. I try to avoid using any sort of hammer since I added some "character" to my first lower too. Sharpie or paint pen can help conceal that character though.

Edited to add some gratuitous AR pics because this thread is seriously lacking in visuals.

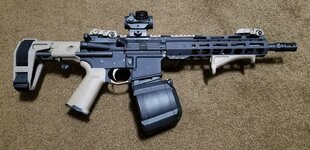
Anderson lower with PSA 10.5" (5.56) pistol kit with their improved trigger. FDE furniture. TRS-25 red dot. Since removed the angled fore-grip and replaced with a little Ariska stop to help keep my hand behind the muzzle.
AR_Pistol_20180405_2.jpg

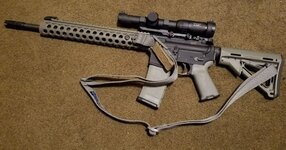
And this was my first AR. Anderson lower with BCM LPK and AR15Performance .223 Wylde 16" barrel with a ceracoated Troy Alpha rail. Foliage green furniture. Primary Arms 1-6 scope.
First_LR_AR_1.jpg

Same carpet in both pictures. Different lighting and camera. Again, good luck with your build.
 
Last Edited:
I tend to put the slightest crimp on the leading end of the rollpin. Just enough to get it sitting in the hole before crimping with pliers. I try to avoid using any sort of hammer since I added some "character" to my first lower too. Sharpie or paint pen can help conceal that character though.
That was my issue, the roll pin failed to start and collapsed lol. I had a hell of a time with hammering roll pins until I got a good set of roll pin holders and bought a smaller hammer. Haven't had a problem since.
 
replaced with a little Ariska stop to help keep my hand behind the muzzle.


And this was my first AR. Anderson lower with BCM LPK and AR15Performance .223 Wylde 16" barrel with a ceracoated Troy Alpha rail. Foliage green furniture. Primary Arms 1-6 scope.
View attachment 688244

I love Arisaka products, their finger stop is great.

What is that scope mount you're using there?
 
The mount for the red dot is just a little UTG that lets the red dot cowitness the BUIS. The scope mount on the 16" build is the Primary Arms extended scope mount. It came as a package deal with the scope.

As for the Ariska stop, it's my only Ariska product but it's built so well I won't hesitate to try another one of their products if the need arises.
 
Some of the newer lowers have the trigger guard built into the frame, which is nice because that's sort of a stupid part to have to put in there.

I disagree with this statement, in part. If you're just building a plinker it's fine to have a solid trigger guard. If you're going to potentially use the rifle in the cold, with thick gloves, having the ability to use a wide-loop guard so your fingertip doesn't fall off is an advantage.
 

Upcoming Events

Teen Rifle 1 Class
Springfield, OR
Kids Firearm Safety 2 Class
Springfield, OR
Arms Collectors of Southwest Washington (ACSWW) gun show
Battle Ground, WA
Redmond Gun Show
Redmond, OR

New Resource Reviews

New Classified Ads

Back Top