JavaScript is disabled
Our website requires JavaScript to function properly. For a better experience, please enable JavaScript in your browser settings before proceeding.
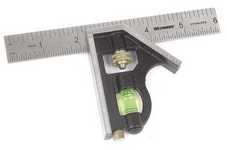
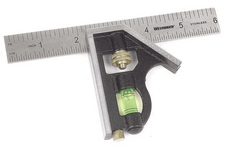
Get yourself one of these to establish the reveals of the casing on the jambs. 1/4" is a common standard. As your nailing the casing, use the square as a guide. Butt it to the edge of the jamb and casing. Viola perfect reveals.

1588836219908.png

Guys that 'eye it' are hacks.

When taking measurements. Understand that a 45 degree angle lengthens a board by its width. IE. a 3 7/16ths " wide stick of casing that is 48 inches long(square), it grows to 51 7/16ths" to the long point of a 45. This comes in handy, as while your measurement might be to the short point, it's much easier to cut the angle first. Pull one's cut measurements from the long point, and then make a square cut to the desired length. Instead of the alternative of potentially have to cut an angled cut shorter each time until one gets it exactly to the mark.

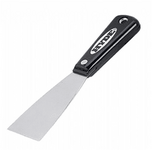
One of these can come in handy doing casing that has mitered corners.


1588836466383.png

Slip it behind the joint to keep the two pieces flush when nailing the corners. A micro-pin along the edge can also help keep the joint tight.

When shooting your brads at the jamb edge, rotate the gun 90 degrees(gangsta style). This can help prevent blowouts if the head of the nail hits the grain -- which can cause the nail to veer and pop out the face of the jamb.

Another way to avoid blowouts is to put 1 1/4" brads at the jamb edge of the casing and 2" brads at the framing/drywall edge. Both size brads will fit in the magazine of the nailer at the same time, so it's easy to swap back and forth between them.

When it comes time to do base, cut a short stick at an easy fixed number that you can jamb tight into the corner, and then measure to the stick and add the two numbers. IE. cut a stick to 10" butt to it and then measure your total length and add the 10 inches for your cut #. Inside/outside corners are usually built up with plaster. It helps to use short tester pieces to check angles. As a rule of thumb - for outside corners.. Make 90s (two 45s) work. Don't try to get fancy and do compound miters, or try to shrink/grow the angle. Run the piece out long enough until two 45s work. Get yourself a 12" saw so you can cut your base upright and therefore use the miter table instead of having to mess with rotating the bevel gauge back and forth to make your cuts. A vertical cut is often a lot easier to get true along the fence, than the bevel cut.

Run the base pieces a little long at the corner and scribe the back with a pencil, or measure to the longest(proudest plaster) points for your short cut on outside corners.

It's paint grade, don't worry about wavy gaps along the top, they can be caulked. However,you still want to get purchase into studs, especially with a taller base. Exterior walls are either 16 or 24 on center(if newer built). Interior walls are on 16. An easy way to find layout(if you don't have a studfinder or magnet) is find an electrical outlet in the open field and knock with a knuckle on either side of it. Then just put your tape measure on the floor on layout and nail away. One finish nail @ each stud is good for the top of the base. Into the bottom plate, no need to over nail - one every other stud distance is fine.

Glue your joints.

Measure all of your long lengths first and cut and install those. Then use the cutoffs to finish the rest. The less two piecing the better. If doing a splice, make a 30 degree beveled joint. Try to hide them where furniture will go.

If you are installing where carpet will be installed. Make a few 3/8ths spacers and hold the base off the floor so the carpet installers can properly tuck their carpet. If installing on an old wavy wood floor or uneven tile, it can help to slightly bevel the bottom of the base. This creates a sharper edge to form fit to the floor.

Crown is easy. Forget the coping saw. Might as well get a miter box and a handsaw if you want to go Amish. Get a grinder and a good feather wheel. Take a pencil and darken the line along the profile and the back cut/grind with the wheel to finish the cut.

Uneven dipping ceiling? Once again. Paint grade? Snap a level line at the elevation where the crown fits and go to it. Don't try to telegraph every lump in the ceiling. Remember... Caulk and paint makes a carpenter what he ain't. Stain grade? Get ready to scribe and invest in a good sharp block planer.

The tester pieces(as with base) apply here with crown too. Just temp. tack them in with a brad or two and measure to them.

I'm only scraping the surface here, but there's a few tips to help you along your way. 1588836303088.png
 
Many new houses, and especially old ones, do not have square corners. I can only offer a few bits of wisdom.
  • complex angles like your cove can be deceiving. Buy 1x3 firing strips and practice with them.
  • Where you run into bad angles, you can measure the angle and adjust accordingly. On acute angles (less than 90°), I would then remove backing material off the moulding. On oblique angles (> 90°), I would cut both pieces long by as much as a heavy 32nd. Much, much easier to remove than add.
  • On pieces that I have cut too long, sometimes a good rasp file is all you need for proper fitment. Ever tried to take a 64th off a moulding piece? Unless you have a quality blade, that thing is going to walk.
  • On outside corners, measure and cut to the face edge dimensions. Cutting to wall dimensions invariably has a few (or all) wind up looking like an all thumbs framer did it.
  • If you're just cutting simple rectangles in a mitre saw, the back base is good. On moulding, where you have multiple anges, I have built jigs to hold and support my molding in place. For example, a 45° backing block for crown moulding. Makes it so much easier to clamp, hold true angles, etc.
  • I used to insist on getting hemlock or hardwood for my moulding. Now, if it's going to be painted, it's most likely MDF because the stuff's so cheap.
  • I can have a hole in the wall or a switchplate off and ignore it. Bad cuts I've made in moulding, or an uneven tile set, bother me, even decades afterward.
 

Upcoming Events

Lakeview Spring Gun Show
Lakeview, OR
Albany Gun Show
Albany, OR
Falcon Gun Show - Classic Gun & Knife Show
Stanwood, WA
Wes Knodel Gun & Knife Show - Albany
Albany, OR

New Resource Reviews

New Classified Ads

Back Top