JavaScript is disabled
Our website requires JavaScript to function properly. For a better experience, please enable JavaScript in your browser settings before proceeding.
Messages
1,169
Reactions
3,630
I'm (hopefully) getting close to installing base, crown and window molding after a repaint, and have no previous experience doing it. I have coping, compound miter, and band saws, nail gun, Black and Decker Workmate 425 workbench, and an angle measurement tool. Aside from a copious amount of patience, does anyone have any additional tool suggestions? Thinking of doing a 'farmhouse' style of window and base molding, so nothing too fancy.

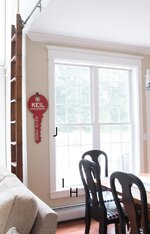
Farmhouse-Style-Trim.jpg
 
practice your returns and copes before you jump into it, measure twice cut once, and you tube is your friend

Definitely going to practice a bit before getting started, some of those youtube videos were giving me anxiety about not considering the next cut angle and screwing up one side of the mold thereby wasting the whole piece.
 
Crown molding is the hardest of all. Those corners are tough. Find someone who has done it before for advice. (This Old House videos will help)
Window molding starts at the bottom and then the sides and then across the top
Base molding - try to hide your joints (behind doors, couches, etc).
Pre-paint everything if possible. It'll make it much easier at the end.
 
I have to find angles in my projects everyday. The way I do it is often like this. Take two pieces of scrap and align them along each axis over lapping at the corner, and then mark the inside corner and outside corner, then check the angle on both pieces. They should be the same or nearly so. I then cut the scaps at that angle and put them back along the two axises and see how my miter looks. The seam should be tight and both the long point and the short point should match. I use a skil saw most of the time and only use a miter saw if there is a lot of angled cuts or they are compound miters. Being said, I work with cedar mostly and not moulding.
 
Crown molding will be upside down when cutting it on a compound saw. One that tilts both ways is a must.
Older homes would have a small gap at the top of the crown molding as the ceilings were never straight and level.
 
My hat's off to those pro's that do this daily. :) For those of us that only do it once in a while, it's always a matter of flipping it over mentally and thinking the opposite of how we should be making those cuts. If that didn't make sense, that's how us non-pros tackle the corner cuts. Lol.
 
Last Edited:
My hat's off to those pro's that do this daily. :) For those of use that only do it once in a while, it's always a matter of flipping it over mentally and thinking the opposite of how we should be making those cuts. If that didn't make sense, that's how us non-pros tackle the corner cuts. Lol.
I'm an engineer, and I definitely have to sit and think about it. I won't mention the number of wrong cuts....

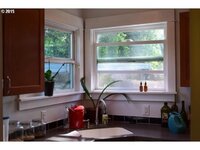
I made this molding for all of my new windows and door trim.

l79f05545-m3xd-w640_h480_q80.jpg
 
Last Edited:
Moved into a new place and the front door is poorly hung. Installed by the initial builders I'll bet. But they remodeled the inside and every single interior door is perfectly hung. Fit and finish is great. A good carpenter is a talent.
 
I'm an engineer, and I definitely have to sit and think about it. I won't mention the number of wrong cuts....
My older brother does kitchens, carpentry, etc. He's really good at his craft. Nothing annoys him more than when I say, "measure once, cut twice, right?" :p
 
Kregg jigs has a tool to help with the crown which is the only thing you may want help with. Most chop saws have pre determined marks at the 33 deg at the angle and bevel to get you close and if you dont have a bi compound chop saw realy pay attention to how you flip and spin the material for the other sides cut.
 
I'm (hopefully) getting close to installing base, crown and window molding after a repaint, and have no previous experience doing it. I have coping, compound miter, and band saws, nail gun, Black and Decker Workmate 425 workbench, and an angle measurement tool. Aside from a copious amount of patience, does anyone have any additional tool suggestions? Thinking of doing a 'farmhouse' style of window and base molding, so nothing too fancy.

View attachment 693396
Take your brain pills and once you get rolling it is intuitive.
Set up a good table for your chopsaw (power miter saw).
Find your "backing" (studs) and mark with blue tape where needed.
Make up your "cut list" and use symbols to help you identify the cut (long point vs. short point, etc)
Wall intersections are quite often not perfect 90's therefore using the "cope" technique can be your friend in some areas.

ETA:
Recommend using air.
I like a 2-1/2" finish gun and an 1-5/8" pin nailer.
Have some good wood glue like Titebond.
A sanding block made from a belt sander belt and 1x is the bee's knees, as well as some files to fine tune your "copes".

ETA2:
And a 55 gallon drum of caulking
:D
 
Last Edited:

Upcoming Events

Lakeview Spring Gun Show
Lakeview, OR
Albany Gun Show
Albany, OR
Falcon Gun Show - Classic Gun & Knife Show
Stanwood, WA
Wes Knodel Gun & Knife Show - Albany
Albany, OR

New Resource Reviews

New Classified Ads

Back Top