JavaScript is disabled
Our website requires JavaScript to function properly. For a better experience, please enable JavaScript in your browser settings before proceeding.
Been there, done that...:rolleyes:
The ring is a bugger to get out of the tub.:eek:
Next time try a bucket of soapy water with a shotgun swab on your cleaning rod.
The wet swab creates a suction in the barrel that pulls the water in and out, or you
can just pour the water into the barrel.:)

I drew the water out of the tub; I didn't use the tub for cleaning . Then I used
the method you described. I also started the tea kettle to get hot water to pour
water down the bore when I was finished scrubbing. Finally I used a patch coated
with gun oil to coat the bore & outside of the barrel (I also removed the lock
mechanism and cleaned the underside). The nipple was placed in warm soapy
water while I cleaned the lock & barrel ; I cleaned and dried the nipple then used
anti-seize compound on the threads as I reinstalled.

Blessings,
Longbeard
 
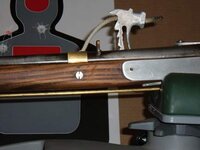
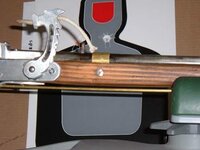
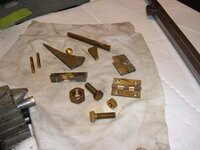
While waiting for parts for my rifle build, I've been fine tuning the Matchlock. I made a new rear, (peep) sight and I made new barrel retaining pins. I liked the looks of the ones I've seen that are threaded into a button on either side of the forearm, so I made some. o_O

First, I over drilled the existing holes in the stock, 3/16" down with a 3/8" Forstner drill bit. That was a trick to do.:eek:Then I threaded the rods on each end. The buttons were fairly easy. After drilling and tapping an aluminum rod on the lathe, I turned it down to fit the new holes, cut off 6 , 1/4" wide buttons and slotted one side with a hacksaw, so they could be tightened with a, "Tamper Proof" screw driver tip.:D

After reinstalling the barrel, I tightened the buttons down until they were tight and then filed off any material sticking out. As I was filing away, I had to keep renewing the slot with a hack saw.:rolleyes:

When finished I re-stained anywhere I had buggered up the finish. :eek:
I'll see if I can get some decent pictures. :)
 
Last Edited:
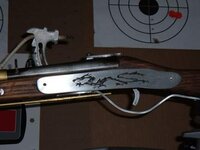
Black Dragon-sm.jpg I guess I should have put the pictures under Matchlock where they belong. :rolleyes:

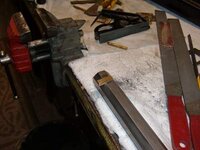
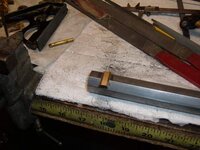
Barrel Pins-1.jpg Barrel Pins-2.jpg ]

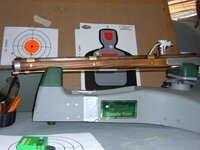
More tinkering...:rolleyes:
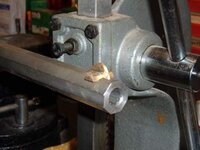
Barrel Pins-3.jpg Barrel Pins-3.jpg
 
Last Edited:
Capn Jack;

Some more VERY Fine hand work. It's a matter of Different Strokes got Different Folks. What you might want to look into is a Set of Screw Slot Files from Brownells. Your Slots will then be Parallel and the Bottom will be Flat.

Good Luck with your Current Project(s)!
 
Thanks KKG,
As I've said before, I'm just feeling my way. I didn't even know what a, "Forstner Bit" was, until I stumbled on them at the hardware store. Other than being a mechanic most of my life, I took a machinist apprentice course in high school over 60 years ago and I was looking for an, "End Mill". :D
 
I still have a number of parts in the mail and I would like to find a better piece of wood for a stock, but with summer almost upon us, I may have to move this project to the back burner. My boat has been feeling totally dejected and Canada will soon beckon.:(
 
My tang and breech plug arrived, so while the boat is being painted I headed off to my local machine shop.:D
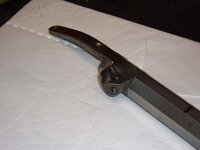
The new barrel is too long for my lathe, so I had to have a shop crown the muzzle and tap for the breech plug.:(
Fellow said he couldn't work on guns.:eek:
So I told him, "It's not a gun. It's only a pipe with some grooves down the inside." :rolleyes:
I cut the last couple of threads so that I could time the breech plug and it came out on the money.:)
I found a great article on how to cut the dove tails for the sights and the barrel retainer. They will probably
be my next project.:D
 
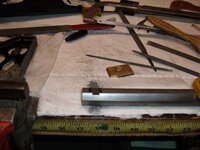
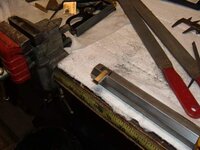
Here is the first sight dove tail and base. Proving once again, "Even a Caveman can do it.":eek:
Fingers sure start to cramp after a few hours of filing...:rolleyes:
Rear sight to go. I'll hold off on the trunnions until I decide on a stock.:)
* There is an excellent article on cutting dovetails on the, "Cast Boolits" Site.
Front Sight-1.jpg Front Sight-2.jpg Front Sight-3.jpg Front Sight-4.jpg
 
Last Edited:
Front sight. Still needs some trimming. I left it high to shoot low figuring I can cut it down later. ;)
What a PIA. Almost too small to work with.:rolleyes:
The blade is 1/2 of a little cabinet hinge.:eek:
Now to figure out the style of leaf for the rear.:cool:

16-Front Sight Blade.jpg
 

Upcoming Events

Teen Rifle 1 Class
Springfield, OR
Kids Firearm Safety 2 Class
Springfield, OR

New Resource Reviews

New Classified Ads

Back Top