Navigation
Install the NWFA app
How to install the app on iOS
Follow along with the video below to see how to install our site as a web app on your home screen.
Note: This feature may not be available in some browsers.
More Options
You are using an outdated browser
The browser you are using is likely incompatible with our website. We recommend upgrading your current browser or installing an alternative.
JavaScript is disabled
Our website requires JavaScript to function properly. For a better experience, please enable JavaScript in your browser settings before proceeding.
-
Join the #1 community for gun owners of the Northwest
We believe the 2nd Amendment is best defended through grass-roots organization, education, and advocacy centered around individual gun owners. It is our mission to encourage, organize, and support these efforts throughout Oregon, Washington, Idaho, Montana, and Wyoming.Free Membership Benefits
- Fewer banner ads
- Buy, sell, and trade in our classified section
- Discuss firearms and all aspects of firearm ownership
- Join others in organizing against anti-gun legislation
- Find nearby gun shops, ranges, training, and other resources
- Discover free outdoor shooting areas
- Stay up to date on firearm-related events
- Share photos and video with other members
- ...and much more!
Build Thread First AR build-would like some tips
- Thread Starter OldTengu
- Start date
Silver Supporter
- Messages
- 3,259
- Reactions
- 7,011
- Thread Starter
- #22
Thanks for all the tips. I definitely will keep everyone posted with build status once all the parts arrive and work area is set up.
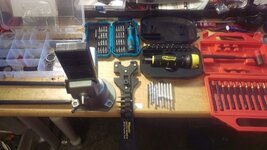
When it's all done you will have almost the same amount of money in tools .that it would have cost to just buy a gun LOL
And, that's why you end up bulding another one...
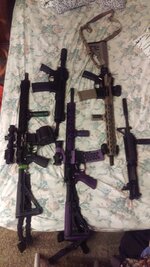
Well that's true im five deep nowAnd, that's why you end up bulding another one...Have to justify their existence and cost...
Member 34319
- Messages
- 17,146
- Reactions
- 37,069
Common mistakes:
Installing hammer spring backwards.
Not supporting trigger guard's ears and breaking one off.
Scratching engraved side while installing bolt catch pin.
Tips:
Tape off engraved side along area where you will be tapping in bolt catch pin. Or use a set of taped up pliers to squeeze pin into bolt catch holes.
Thread rear takedown pine hole with 4-40 tap and cut length of 4-40x1/8" screw off spring to capture spring and detent vs fighting end plate and buffer.
Purchase an aftermarket trigger guard with captured detents to prevent having to punch a pin through.
Roll pin starter punch's help. As do roll pin punches.
Not much more I can add here. I've done around 10 lowers with a small plastic dead blow hammer and a set of roll pin punches. And a roll of blue painters tape.
Small tip, grab a can of Mothers Mag and Aluminum Polish. It works well on the FCG. Any place you see that looks shiny from the factory "polish" job? Hit it with some Mothers and a microfiber cloth. Really cleans up most Mil-Spec triggers. Also watch how far you thread the buffer tube in. You may get another revolution past where it covers the buffer detent but it can also cause the detent to get sticky.
That's all I got.
Thread rear takedown pine hole with 4-40 tap and cut length of 4-40x1/8" screw off spring to capture spring and detent vs fighting end plate and buffer.
Roll pin starter punch's help. As do roll pin punches.
I love that one, did my first one about a month ago and am doing to the others now...
Diamond Supporter
Gold Supporter
Silver Supporter
- Messages
- 3,566
- Reactions
- 6,638
Mine would have been a cotter pin! (as shown on other videos)
This was my favorite to watch before my first build and during....step by step instructions.
This one is good too.
I used this one on more than one occasion......
- Messages
- 2,422
- Reactions
- 3,957
The good news is that building your own AR15 is certainly doable. This is not rocket science. You can have fun and build your own. Consider it less complicated than a typical hot rod engine build project. All it takes is some knowledge and proper tools.
If you want specifics just hit on this forum in the AR15 firearm build and maintenance sub forums. Fun. Easy. Doable. Look for the posts by HB of CJ. Old school. The proper way. Or you can choose to PEM if your want to. No time right now to add more.
Hundreds of AR15 builds. Uncounted many M16 rebuilds. Long ago, far way. Dinosaur.
Last Edited:
Bronze Lifetime
- Messages
- 12,609
- Reactions
- 28,792
Brownells has a pretty good How To Build an AR15 section on their website. Video helps, but I've built two lowers and soft-fitted (not fully torqued) an upper using only the text version.
Also, Allen wrenches. A long one for the grip screw, the one thing Wheeler doesn't include. And an Altoids tin or similar--all the rail-mount accessories come with a metric F-ton of Allen wrenches, you're gonna need something to store 'em all. I also add tape "flags" labeling what tool goes to what part.
Also, Allen wrenches. A long one for the grip screw, the one thing Wheeler doesn't include. And an Altoids tin or similar--all the rail-mount accessories come with a metric F-ton of Allen wrenches, you're gonna need something to store 'em all. I also add tape "flags" labeling what tool goes to what part.
- Messages
- 4,091
- Reactions
- 13,284
I built my first lower with nothing more than a small jewelry hammer, a buffer tube spanner, and an eyeglass repair kit. I did it on a TV tray, while watching a youtube how to. 2 years and 1000+ rounds later it has yet to fail me. I shared my experience here The Stages of AR addiction... my trip down the rabbit hole.
While I approach the subject of AR addiction in a comical way... it is actually a very real thing. Beware! I have a few friends that I've made on this forum that like me have a pretty bad case of it... The great prices we are seeing on parts right now is not helping matters!
While I approach the subject of AR addiction in a comical way... it is actually a very real thing. Beware! I have a few friends that I've made on this forum that like me have a pretty bad case of it... The great prices we are seeing on parts right now is not helping matters!
- Messages
- 4,091
- Reactions
- 13,284
Common mistakes:
Installing hammer spring backwards.
Not supporting trigger guard's ears and breaking one off.
Scratching engraved side while installing bolt catch pin.
Tips:
Tape off engraved side along area where you will be tapping in bolt catch pin. Or use a set of taped up pliers to squeeze pin into bolt catch holes.
Thread rear takedown pine hole with 4-40 tap and cut length of 4-40x1/8" screw off spring to capture spring and detent vs fighting end plate and buffer.
Purchase an aftermarket trigger guard with captured detents to prevent having to punch a pin through.
Roll pin starter punch's help. As do roll pin punches.
Another tip for the rear takedown is to trim the spring about 1/8" or so... I actually trim both takedown springs. it helps with install, and can make the pins move a little smoother.
The Aero's rear TD all come pre tapped 4-40. I went to my local wilco and bought all the 1/8" set screws they had... I still need a 4-40 tap for the rest though... One of the aero lowers I recently built had a threaded bolt catch too..
Now if they came up with something for the safty spring, and the front takedown it would make it too easy.
- Messages
- 2,422
- Reactions
- 3,957
Helpful Hints: This is stuff learned the hard way.
1) Use a very thin kitchen steak knife blade to hold in the pesky front take down pin spring and detent. Then slide in the front take down pin. Also use a large very thin transparent dry cleaning clothes bag as a large containment bag. Amazing hang times with the various tiny small parts ... if they fly out. They will.
All you need to hold down the lower is that big 5-6 inch bench vise and a chunk or hunk or indoor outdoor carpet or whatever for padding.
2) That pesky trigger guard roll pin gets GENTLY PRESSED IN. Do not bang away with a hammer and roll pin punch. Do not use vise grips or channel locks. Stupid wrong. Gently use that 5 or 6 inch smooth jaw bench vise and slowly PRESS that roll pin in. You WILL break the lower. Do not ask me how I know.
Long ago, far away, the busted rebuild-able M16 lower receiver resulted in some epic arse chewing and unbelievable paper work.
I believe Brownell's now sells a nifty cool tool for this. Every wonder why?
3) No staking anywhere on the build!! The carrier key screws get put in with small lock washers under neath the shallow height Allan head screws. Torqued up properly with a dinky torque wrench. Red Lock Tight optional. But you do not tighten nor torque up those screws until the barrel is properly torqued up. Old school.
4) That pistol grip screw MUST be a Allan head type. Another lock washer here. Blue Lock Tight. A Phillips type screw is wrong. A slotted head screws is dead wrong.
5) The easy-to-install magazine catch assembly is easier using a simple pencil with eraser to push in the mag catch button. A soft eraser. NOT a roll pin or straight pin punch. A steel punch is stupid. Scaring is avoided.
All for now. More later.
hundreds of AR15 builds.
I use the front takedown pin itself instead of a blade or something. Easy to do with the lower standing on its end. Depress the spring and detent with the pin, then just push it in. Learned it from a fellow member here who made a YT video. I'll link if I can find.
Silver Supporter
- Messages
- 9,118
- Reactions
- 16,644
There are some REAL BS AR Build videos on Youtube.
Beware of that.
The best one is the free video series by Brownell's.
It's professionally done.
All the tools used are called out in the various videos.
https://www.brownells.com/aspx/learn/learndetail.aspx?lid=11004
You will need a good vice.
I like a 5"
You will need good tools and namely, punches for a damage-free assembly.
Brownell's Starter Punches
Grace USA Roll Pin Punches
Brownell's Bolt Catch Roll Pin Punch
And then your "fixture".
This is what holds you upper securely and damage free while you torque the barrel nut.
I think the Brownell's clamshell is the best of that type.
And then the pin and tophat style is best for billet uppers.
AR-15 ATP Upper Receiver Vise Block
I bought mine from a guy on Ebay that makes a great fixture :
AR15 VISE BLOCK .223 .556 BENCH TOOL HEAVY DUTY upper vise block 2pc set | eBay
Do not use a fixture called Panther Claw.
It doesn't have the tophat as seen in the above, so it is only good for light work.
NOT BARREL WORK
You will also need a good AR Barrel nut wrench
Beware of the Chinese junk wrenches
I have the USGI wrench and the Gem State Armory wrench
The GSA wrench is hard to find but they are sweet
Best $40 wrench on the market
Made in Idaho.
If you need some AeroShell 33MS PM me.
Last Edited:
Share This Discussion
Similar threads
- Replies
- 34
- Views
- 1K
- Replies
- 22
- Views
- 458
Upcoming Events
New Classified Ads
-
SMITH AND WESSON 52-2! 38 MASTER SPECIAL MID RANGE EXC COND IN THE BOX!
- Started by gprippers
- Replies: 0
-
-
Aero Precision 300 Blackout 8inch complete upper
- Started by Hunter340
- Replies: 0
-
-
-
-
-
-
-
Support Our Community
If our Supporting Vendors don't have what you're looking for, use these links before making a purchase and we will receive a small percentage of the sale


