JavaScript is disabled
Our website requires JavaScript to function properly. For a better experience, please enable JavaScript in your browser settings before proceeding.
Messages
6,779
Reactions
1,275
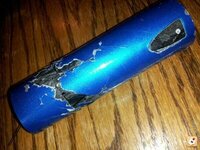
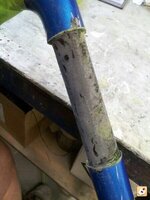
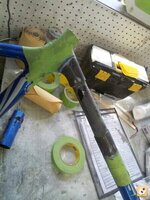
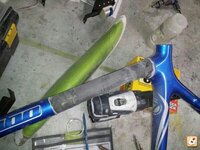
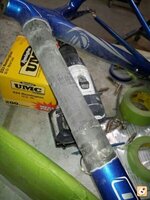
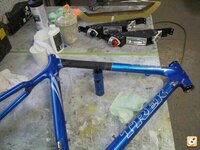
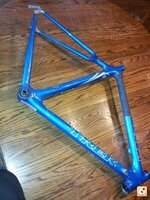
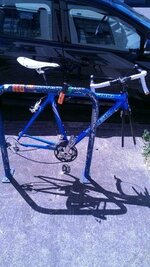
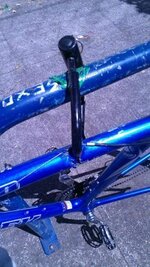
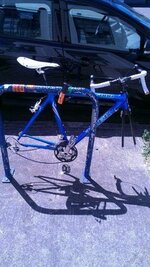
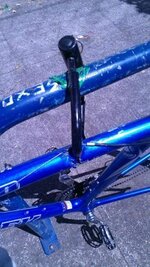
I picked this up from Craigslist just to get a good set of Bontrager carbon forks but I got to thinking hey if we can build carbon jets and 400 mph landspeed motorcycles I'll bet I can fix this frame.

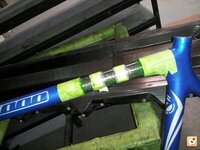
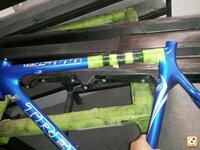
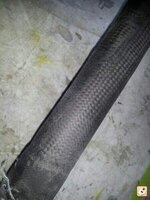
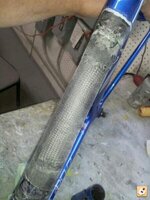
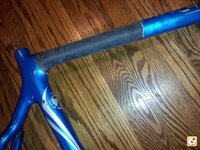
I will fill in details of the process later. This was done on my lunch and breaks over three days at work.

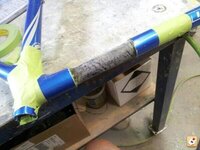
Left to do is filling and sanding with a mixture of resin and carbon dust as a body filler then sand and blend to perfection, then add the last layer of carbon mat as a perfect beauty layer with a gloss finish.

ejynyne9.jpg

by2uqebe.jpg

3atutyma.jpg

asuqyvej.jpg

usu2a3ys.jpg

yteregar.jpg

ahyze2us.jpg

u7a6eda2.jpg

a2ybe9ur.jpg


4a2apama.jpg

u3e2ybub.jpg

tehuhaga.jpg

agysuza7.jpg

nu2yhaty.jpg

jaty4esa.jpg

7ygybuhy.jpg
 
Last edited by a moderator:
Pretty good looking. Are you going to ride it or try to sell it?
"Rager" carbon forks.?. I'd keep the rage on the down low with about carbon anything. lolz
 
I picked this up from Craigslist just to get a good set of Bontrager carbon forks but I got to thinking hey if we can build carbon jets and 400 mph landspeed motorcycles I'll bet I can fix this frame.

I will fill in details of the process later. This was done on my lunch and breaks over three days at work.

Left to do is filling and sanding with a mixture of resin and carbon dust as a body filler then sand and blend to perfection, then add the last layer of carbon mat as a perfect beauty layer with a gloss finish.

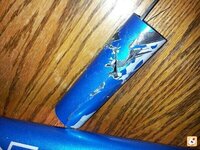
You can buy Carbon Fiber repair tape at West Marine and West System Resin.
Also at Tap Plastics on Sequoia Pkwy in Tigard. They have the cloth, Carbin Fibre and Kevlar.
Also if you want to get info, talk to the Helo shops that do the blade repair.
Sounds like you are already knowledgeable on all that already.


Lol, we throw away more Carbon materials than Tap plastic keeps in stock.
 
Looks like you know what you are doing. How did you prepare the surface of the bike and tube to get a good bond. I have done a bit of work with epoxy, and have had trouble with getting a good bond on cured surfaces.
 
Looks like you know what you are doing. How did you prepare the surface of the bike and tube to get a good bond. I have done a bit of work with epoxy, and have had trouble with getting a good bond on cured surfaces.

You need a proper adhesive, we use many different formulas for Hysol to bond, now to layer more carbon over carbon you use a carbon resin just as if you were laying up virgin parts.

If this is a curved part since you likely are not equipped to vacuum bag and infuse just lay up the carbon as you would fiberglass, then wrap with peel ply, rap tight with tape starting at the center and working your way out to squeeze out resin

Here is a cut and paste from a question asked elsewhere about the repair.

Your repaired area will likely transfer stress to the center of the top tube where the original tube isnt designed to take up an abruptly/sharply transferred load... Which will likely result in another failure for you to fix...

If there is a failure it won't be in the top tube it will be in the OEM parts of the frame. My though on the repair is that the top tube stress is mostly in compression. We do this same type of repair on tubing in aircraft where the stress is expansion and compression and we've never had a failure

To be technical the repair runs nearly the full length of the top tube.


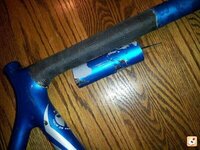
Before repairing I scoped the inside tube to see any damage not visible from the outside, this was done to determine where to cut the tube


Steps to repair from the inside.

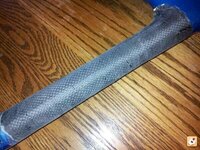
1. I took a 3" diameter cardboard tube a bit longer than the total length of the original top tube, cut slice out of the middle so that if you viewed it from the end it would look like a "C"

2. Inside that tube I lined with Teflon tape for it release properties. I then laid up a 1 ply of 6k weave and 1 ply of single directional Carbon (Uni)

3. I vacuum bagged and then infused with resin and baked it with our next oven run.

4. I trimmed the completed patch to fit a paper template that was pre-fitted.

5. Scuff prepped and clean the inside surface of the frame and scuffed and cleaned the patch.

6. Swabbed with Hysol adhesive on the outside of patch, patch overlap, and a skim coat on the inside of frame

7. Fitted the patch into the frame and fished an air bladder into the inside of the patch to expand it to the walls of the frame.


The frame from the factory is only 5 plies in the center and about 14 at the glue joints I now have 2 more layers reinforcing the original tube (inside the tube) and 7 layers feathered out at the patch at 1/2" increasing overlaps (outside).

There will be 1 more layer just for beauty. This layer will take the most time as a have to fill everything I've done thus far with carbon dust and resin as a body filler and spend much time getting it perfectly round, smooth and of the proper depth. Just as prep is the key to a perfect paint job it is also the key to a perfect beauty layer on carbon fiber

I have a 100% confidence in my repair at least in so much as anyone can have confidence in a Carbon frame from the OEM.

This repair is more just for the fun of it as was just headed to the dumpster.
 
You need a proper adhesive, we use many different formulas for Hysol to bond, now to layer more carbon over carbon you use a carbon resin just as if you were laying up virgin parts.

If this is a curved part since you likely are not equipped to vacuum bag and infuse just lay up the carbon as you would fiberglass, then wrap with peel ply, rap tight with tape starting at the center and working your way out to squeeze out resin

Here is a cut and paste from a question asked elsewhere about the repair.


If there is a failure it won't be in the top tube it will be in the OEM parts of the frame. My though on the repair is that the top tube stress is mostly in compression. We do this same type of repair on tubing in aircraft where the stress is expansion and compression and we've never had a failure

To be technical the repair runs nearly the full length of the top tube.


Before repairing I scoped the inside tube to see any damage not visible from the outside, this was done to determine where to cut the tube


Steps to repair from the inside.

1. I took a 3" diameter cardboard tube a bit longer than the total length of the original top tube, cut slice out of the middle so that if you viewed it from the end it would look like a "C"

2. Inside that tube I lined with Teflon tape for it release properties. I then laid up a 1 ply of 6k weave and 1 ply of single directional Carbon (Uni)

3. I vacuum bagged and then infused with resin and baked it with our next oven run.

4. I trimmed the completed patch to fit a paper template that was pre-fitted.

5. Scuff prepped and clean the inside surface of the frame and scuffed and cleaned the patch.

6. Swabbed with Hysol adhesive on the outside of patch, patch overlap, and a skim coat on the inside of frame

7. Fitted the patch into the frame and fished an air bladder into the inside of the patch to expand it to the walls of the frame.


The frame from the factory is only 5 plies in the center and about 14 at the glue joints I now have 2 more layers reinforcing the original tube (inside the tube) and 7 layers feathered out at the patch at 1/2" increasing overlaps (outside).

There will be 1 more layer just for beauty. This layer will take the most time as a have to fill everything I've done thus far with carbon dust and resin as a body filler and spend much time getting it perfectly round, smooth and of the proper depth. Just as prep is the key to a perfect paint job it is also the key to a perfect beauty layer on carbon fiber

I have a 100% confidence in my repair at least in so much as anyone can have confidence in a Carbon frame from the OEM.

This repair is more just for the fun of it as was just headed to the dumpster.

The new carbon fibre materials and technology are amazing.
My son bought one of the bikes before he did his first Iron Man up in Canada. My wife could lift it over her head with her little finger ... crazy light and strong. But they cost damn near as much as a new car. :)
 
Trismn, not only Beautiful Work, but an awesome tutorial, on carbon fiber build ups!!!

Back three years ago, I thought I would try my hand at some Carbon Fiber work, I am not ashamed to say I failed miserably.... My thinking process is, "what have you got to loose"???? I of course, had No Idea, of the special needs of carbon fiber... And still want to create with it... But, this time, book learning first!!!!

Thanks for the inspiration....

Oh, my project: I have a snake charmer 4Ten, :) and would like to make a correct length of pull stock, keeping the Pistol Grip concept, but two tubes, for the rear stock, hollowed to accept shells, and a cleaning kit, like a bore snake.

But I have got several irons in the fire before that project.... In time though.

philip
In the BoonDocks, I have plenty of time.
 

Upcoming Events

Centralia Gun Show
Centralia, WA
Klamath Falls gun show
Klamath Falls, OR
Oregon Arms Collectors April 2024 Gun Show
Portland, OR
Albany Gun Show
Albany, OR

New Resource Reviews

New Classified Ads

Back Top