JavaScript is disabled
Our website requires JavaScript to function properly. For a better experience, please enable JavaScript in your browser settings before proceeding.
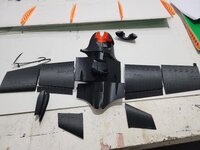
I am still learning Orca. When i print 3d drones on the X1C i can change the infil anywhere on the model by adding a cube (forget the actual term) and change the infil % for that section. i am testing PLA+ and CF in the wing sections currently.

Edited to add: Orca allows you to change the infil anywhere on your print as long as your printer is supported by Orca
 
Last Edited:
my current project

20240214_155023.jpg
 
Oh, that is cool. I saw Bambu (and others) have a foaming PLA that is designed just for RC planes. Have you played with that at all?


As a kid my dad and I would go out to Delta Park just before the I5 bridge to Washington and watch the RC planes. It was so cool to watch, but we never had the guts to give it a try. It always felt like a fast way to go through a lot of money if you make a little mistake. Sadly now all you see at Delta Park is soccer fields and homeless people.
 
I have both foaming and pre foamed PLA to try down the road. This model was designed to be printed with regular PLA or PLA+. i have another drone i am working on that will end up having a 2m wingspan. it can be printed in foaming PLA or PLA+. i am going to print both and see what the differences are weight wise.

I am somewhat new-ish to this too.

i am going to try the foaming PLA on my CR-10 Smarts first. you have to tweek alot of setting apparently to get it to print right. eventually i may try and print the foaming stuff on the K1 or carbon X1 as an experiment. I dont know if the foaming PLA can take the speeds which would negate the use of the faster printers in my mind.
 
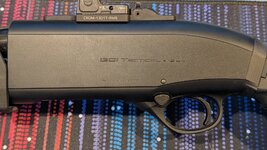
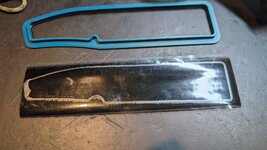
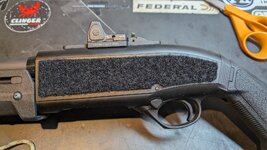
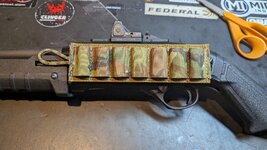
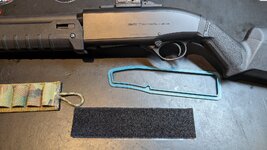
So, this is a super simple one (and probably more work than just using a piece of paper and pencil) Stencil for the side of the Beretta 1301 tactical to cut Velcro for shell a soft holder.
The Velcro for the soft shell holders is just a square sheet and does not fit the receiver properly. This allows me to use a silver sharpie to mark the back of the Velcor so I can cut it to fit the receiver (even leaving a cutout for the pin).

The stencil is a pretty good match, but my cutting kind of sucks. I cut out the marker line on this one, but on the next one I think I will leave the marker to make the Velcro just a bit larger.


PXL_20240303_042504141.jpg PXL_20240303_071055765.jpg
PXL_20240303_071349381.jpg PXL_20240303_071403184.jpg PXL_20240303_071009639.jpg
 
Last Edited:
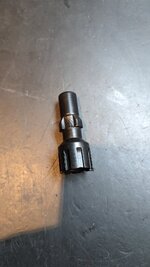
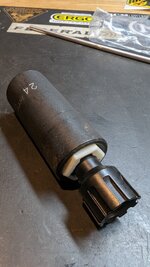
New model for a Tri-Lug install tool.
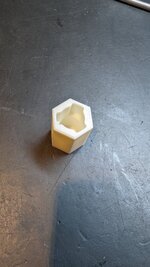
I needed to install a couple of Tri-Lug muzzle devices and did not want to spend $40 on a tool, so I designed this in Fusion 360 and printed it in ASA at 100% infill. pennies worth of filament and 30 minutes on the printer (OK, and about 4 hours of design and trial prints, but still the same day).


PXL_20240428_043949056.jpg PXL_20240428_043954493.MP.jpg PXL_20240428_044017182.MP.jpg

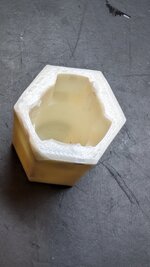
Muzzle device is torqued to about 35 lbs/ft and there is a bit of deformation of the part (as you can see below), but it worked without issue and I can just print another one if needed.

PXL_20240428_164141233.MP.jpg
 
Last Edited:

Upcoming Events

Teen Rifle 1 Class
Springfield, OR
Kids Firearm Safety 2 Class
Springfield, OR
Arms Collectors of Southwest Washington (ACSWW) gun show
Battle Ground, WA

New Resource Reviews

New Classified Ads

Back Top