JavaScript is disabled
Our website requires JavaScript to function properly. For a better experience, please enable JavaScript in your browser settings before proceeding.
UPDATE 10-4-2023:

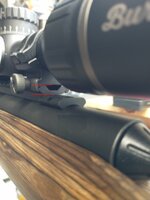
I was not able to find a higher ring set since I need one extended mount due to spacing on the receiver, so my next option was a one piece rail from EGW. This rail is 1/4" taller than the factory rail which "appears" to work for me looking off the stix down the hall. We'll see how it works off the bench.

mount.jpg
 
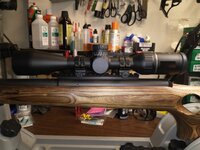
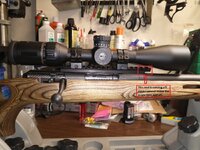
This is a Savage Model 25 in .222 Rem and I need to modify some of the "Monte Carlo" off the stock. This rifle is capable of extremely good groups, but they are way too much work to get since I have to really press my face into the thing the same every time to center up the scope. My thought is to just start sanding away at it (with power of course) but is there a better option? I did look at the Boyd's but they all seem to have that comb except for the At-one which I do not consider an option.

View attachment 1490422
I suggest you forgo power tools. Use a rasp and sandpaper and take your time.
 
This is a Savage Model 25 in .222 Rem and I need to modify some of the "Monte Carlo" off the stock. This rifle is capable of extremely good groups, but they are way too much work to get since I have to really press my face into the thing the same every time to center up the scope. My thought is to just start sanding away at it (with power of course) but is there a better option? I did look at the Boyd's but they all seem to have that comb except for the At-one which I do not consider an option.

View attachment 1490422
The stock appears to be laminated. If so, keep in mind that matching new laminate material may be difficult. These are suggested steps: a) with masking tape, tape the entire area to be modified + all surrounding area on the stock, b) separately make a pattern with corn flakes card board to the desired shape, c) use the pattern to trace the area to be removed/modified, d) use the pattern to trace a pencil line over the tape, e) cut away the tape that will be the wood to be removed; leave the remaining tape to protect the wood that will not be modified, f) use a set of wood working calipers to continually check the depth of the material to be removed to your specifications, e) select the tools to use to remove the wood, e.g. shave and/or curved chisels, f) stop removing wood with the cutting tools at least 1mm before reaching the desired depth and sand the final shape, and g) relaminate or refinish to match.

If you have not done this previously, send me a PM and I am glad to walk you through any part of the process by telephone or video conference. Keep in mind it is easier to remove than to add wood. Adding a taller scope mount/ring set may be a more reasonable solution, but you know what it best for you. Enjoy this fun project.
 
Hey Sarabellum. The pic rail I mounted in conjunction with a slightly higher set of rings has saved me from a whole lot of work on the stock. Thank you very much for the tips though. :)
 

Upcoming Events

Oregon Arms Collectors April 2024 Gun Show
Portland, OR
Centralia Gun Show
Centralia, WA
Albany Gun Show
Albany, OR
Falcon Gun Show - Classic Gun & Knife Show
Stanwood, WA
Wes Knodel Gun & Knife Show - Albany
Albany, OR

New Resource Reviews

New Classified Ads

Back Top