- Messages
- 1,678
- Reactions
- 3,262
Follow along with the video below to see how to install our site as a web app on your home screen.
Note: This feature may not be available in some browsers.
Because an 80% is too easyMaybe we're talking about 2 diff things but why would you build a flat AR when you could buy a one piece machined one for under $50-100?

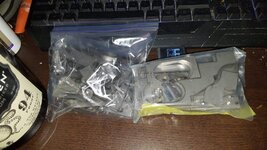
Yep those ones, I thought I uploaded a photo in the OP but must not of. For the AR15 I'm planning on welding the the receiver extension and stock on and using a pin and clip for the rear and for the front pin I haven't decided yet. I might machine down a screw ,thread one side, and use locktite. I'll be making my own grips but I'm not sure how I'm going to attach them yet and the safety denent I'm also not sure how I'm going to do that yet. I might try drilling from the top but, I don't know thats part of what I need advice on.The Flat Spot - Innovative products for firearms builders and more!
This one?
No detents for takedown pins or safety. No threading for the buffertube. no hole and threading for the grip screw. Otherwise doable.

Yep those ones, I thought I uploaded a photo in the OP but must not of. For the AR15 I'm planning on welding the the receiver extension and stock on and using a pin and clip for the rear and for the front pin I haven't decided yet. I might machine down a screw ,thread one side, and use locktite. I'll be making my own grips but I'm not sure how I'm going to attach them yet and the safety denent I'm also not sure how I'm going to do that yet. I might try drilling from the top but, I don't know thats part of what I need advice on.
View attachment 413302


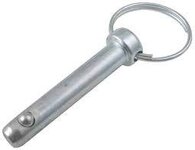
That's the kind of information I'm looking for. Is the safety easy to operate and is there any tactile feedback so you know it's all the way in safe or fire? I'm still going to try and drill it so I can try the Elftmann button safety but if it doesn't work I'll keep that in mind.I used detent pins like these for the takedown pins
View attachment 413310
For the safety, I got a ambidextrous safety. Instead of screwing in the lever on the other side, I used a rubber backed washer. Holds the safety in place and makes it snug so it stays in safe or fire position without the detent.
I drilled and tapped the hole for the grip bolt.
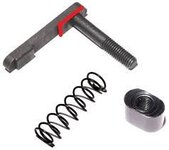
A standard mag release has a raised area that wont allow it to sit in far enough to catch the magazine. You'll probably have to file off the raised area as I marked in red here:
View attachment 413312
these flats blue very easily with Birchwood Casey cheep cold bluing solution.
Most important part is making sure the side pieces with the pin holes for the trigger group are perfectly lined up. Also, the pin holes on mine were slightly large. You may need to get some locking trigger group pins to keep them from walking out the side.
Have fun.
That's the kind of information I'm looking for. Is the safety easy to operate and is there any tactile feedback so you know it's all the way in safe or fire? I'm still going to try and drill it so I can try the Elftmann button safety but if it doesn't work I'll keep that in mind.
Why won't you ever use it? Seems like unless it's unsafe or unusable it would be worth it to slap a cheap PSA upper on it.Yeah, I built one.
A whole lot of work to end up with something that I'll never use. Heavy, ugly and impractical.
Have fun
I'll keep that in mind.Not really. I welded a couple of bumps onto the outside of the receiver so the safety would stop at the appropriate place. Without the detent it does not stop at the appropriate location. Not what I would call good or reliable but that wasnt the point of the build.

Why won't you ever use it? Seems like unless it's unsafe or unusable it would be worth it to slap a cheap PSA upper on it.
.
I see now. Do you have a picture of it?View attachment 414404
Yeah.... because I really need another cheap but "kind of" functional AR like I need another hole in the head... I have at least a dozen unbuilt lowers more deserving of an upper than this steel monstrosity.
It was interesting enough to try, it's worthless as a functioning rifle