JavaScript is disabled
Our website requires JavaScript to function properly. For a better experience, please enable JavaScript in your browser settings before proceeding.
Messages
40
Reactions
110
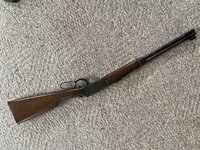
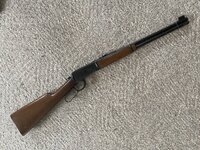
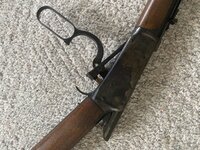
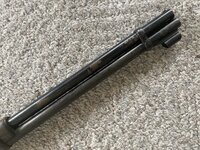
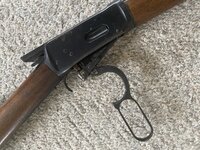
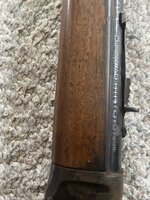
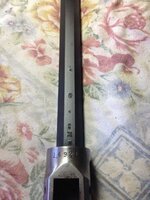
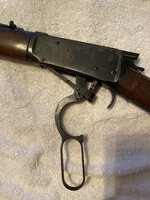
I picked this up (off here with a three way trade of a canoe).
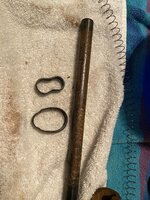
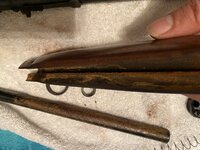
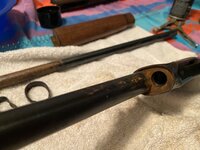
I'm deciding what to do with her. I need the right punches to tear her down, so nothing is happening today.
I figure I'll strip her down. Rub her down with some hoppes I have laying around. Clean off any gunk. OilThen put it all back together and go shoot some cans.
I'll send some after pics, unless someone has a better plan and stops me. Lol.

I'm new to all this.

A924808D-652B-41C0-80FE-0378B0113A08.jpeg 50BFF1B2-B6AD-45C7-9245-EF64F0DFCE87.jpeg C68DDE37-388B-4682-863E-565AE17F8BF4.jpeg 0373EBAC-464F-4B4E-B7E9-C5918F7E5A06.jpeg E2345EC7-8EA8-47D7-86AA-C566FC583F5F.jpeg E6C51028-3AD1-42F0-8E42-F3AB65E7DB7F.jpeg
 
Pretty gun. :s0155::s0155:
I inherited Dad's old Winchester '94 in 32 Win Special. It was his first gun when he was 13 (in 1943 - he's 90 now and still kickin' hard).
If it were me, I'd take her out right now and put a few dozen rounds downrange, just to feel how she does and see where the rounds land w/respect to aim point.
Then clean her up before you put her back in the barn...
 
Last Edited:
Not just a screwdriver but the correct bits for a Winchester. For example, pick the correct Win 94 bits from here:

As a set -


Just the bits-


Pick the right tools for the job and your Winchester screw tops will thank you. Don't and you sometimes stand a chance of buggering up the top of the screw heads.
 
I have a Wheeler screw driver kit. It's very handy due to the assortment of driver head widths and thicknesses. I used them when I tore down my pre 64 model 1894. It makes quite a difference to use the proper tool. Also, make sure the driver slots are clean before you stick the bit in and twist. Over time gunk can build up in the bottoms and the driver will only engage partially, posing a risk of it's own.
 
I have a Wheeler screw driver kit. It's very handy due to the assortment of driver head widths and thicknesses. I used them when I tore down my pre 64 model 1894. It makes quite a difference to use the proper tool. Also, make sure the driver slots are clean before you stick the bit in and twist. Over time gunk can build up in the bottoms and the driver will only engage partially, posing a risk of it's own.

Those Wheeler kits are very nice for sure...
And I totally understand that last bit about how gunk builds up and poses a risk....
I have a 1959 / 1960 ( year depends on what source is used ) 94 with a broken barrel band screw ( rear )
I tried various ways to remove it...but it needs to go to the "Gun Doctor" when I have the funds to get it fixed.
Andy
 
You can likely save yourself some work by getting a can of G-96 cleaner/lubricant/solvent. The stuff works great. I've been using it for longer than you would likely believe. Follow the instructions on the can and you may save yourself a big job.

The spray can is red, yellow and black. The product looks a little like shaving cream out of the can, then quickly liquifies. It's great for flushing out dirt and debris, excellent on rust, does an amazing job on the finish and won't hurt the wood.

This may get you past having to take you rifle apart. Use it outside or over newspaper because you may get a lot of dirt or crud out of the gun that could stain your floor.

It is not a good lubricant if the temperature drops below freezing

Good Luck..
 
I helped a friend clean up his 1930s model 1894. Under the front hand guard it was full of an orange goo!:confused:
More rust found under the stock. I advise everyone that buys a used gun take it apart and clean it
thoroughly.;)
 
I helped a friend clean up his 1930s model 1894. Under the front hand guard it was full of an orange goo!:confused:
More rust found under the stock. I advise everyone that buys a used gun take it apart and clean it
thoroughly.;)

Very good advice here....

I just "fixed" a "broken" CVA 1860 Colt Army replica for someone....simply by cleaning it.
The revolver would not rotate the cylinder and the hammer was stuck in place...
But the revolver look to be in excellent shape when viewed from the exterior.

The gun was made in 1981...and it was stored in the factory carton...
So between he carton's foam has deteriorating and oil drying up and "guming" up the works...
The revolver was "broken"

Slowly taking it apart and cleaning away foam debris and old congealed oil was the trick...
Easy for a me....but for the owner...who isn't really a gun person...it was broken beyond repair.

Often the "fix" for an new to you gun is a simply deep clean.
Andy
 
Bronze wool , gun oil and a light touch will be your friend here...as well as a properly fitting screw driver.
You're in Newport -- go to a sailing or marine repair shop for Bronze or Copper wool. The "copper" or "bronze" wool sold at most places is just steel wool with plating. Use a magnet to check.
Under the front hand guard it was full of an orange goo!
The internals of my 1940's '94 was full of orange goo. Started cleaning the internals after firing and it looked like I was juicing a blood orange.
 
I haven't run across that before....good to know....
With that said...
I have used plain old steel wool with good results....the key with that was a light touch....:D
Andy
True copper wool is one of the best ways to remove calcium deposits or other crud from nickel, brass or chrome plumbing pieces. The plated stuff is like taking a chisel (or a scotch brite scrubber) to it. Freds used to sell it, but cannot find it there anymore.
 
I recommend complete disassembly. Other than a couple things that require a bit of care Mod 94s are pretty simple. I have done many over the years including my 1899 just last summer and it cleaned up nicely. Other than a minimal amount of rust on the exterior it came out well cnsidering it sat in a closet in San Francisco for over 50 years! The bluing under the forestock was in incredibly good condition. I wish the remainder looked like it!

I would recommend the 'penny' trick. If you are unaware of this it is using a COPPER penny (pre '82) as a 'scraping' tool to remove rust.

You will want to use some light oil and just lightly use the penny to 'scrape' the areas of rust and you will be surprised how well it works.

When doing this on the barrel the penny will 'wear' to the radius and very quickly remove any surface rust.

IMG_1702.JPG IMG_1705[1].JPG
 
Last Edited:
Thanks guys. I took it apart a few weeks back. It cleaned up pretty nice. Some old crud and there was rust under the wool. I had a heck of a time putting her back together. The one screw on the barrel was a bear.
The blueing still has issues. But no rust and she shoots great. I'll have to get better after pics. But here were some from the work.
Dave

C8104EE1-8F86-4952-A9B1-B47F55B70B86.jpeg DEAB3A03-4CAE-4DE2-A635-C7937A126A87.jpeg DA2F9485-06CA-496F-9A31-252CBF76A9F5.jpeg D9FAC222-4EAA-47C6-8CFE-4CF7FC52828F.jpeg
 
Thanks guys. I took it apart a few weeks back. It cleaned up pretty nice. Some old crud and there was rust under the wool. I had a heck of a time putting her back together. The one screw on the barrel was a bear.
The blueing still has issues. But no rust and she shoots great. I'll have to get better after pics. But here were some from the work.
Dave

View attachment 730723 View attachment 730724 View attachment 730725 View attachment 730726

Somehow the putting it back together is often a bear. The gunsmiths, the mechanical types and people with advanced skills do well. For others, it can be the lost part, the it doesn't fit, why is it doing that, why isn't that working, the buggered screw head and cold blue to hide the scratch. Try G96 on the blueing. I think you will be pleased.
 
For others, it can be the lost part, the it doesn't fit, why is it doing that, why isn't that working
I have done my share of tinkering/gun smithing and consider myself a pretty good 'novice' (along with most other mechanical applications) however something I have done many times when disassembling a gun or a component is to take a picture of it.
This has helped me many times, especially if a day or two has passed before reassembly due to other repairs or issues.
I have even gone so far as to take pictures of the sides of a receiver, printed them and punched the corresponding screws into their locations on the picture as a guide to reassembly.
Id rather be sure than to look at a cupful of screws & parts and to scratch my head wondering how they go back together.
Tech manuals (for anything) would have no value without pics and few extra minutes to keep my phone handy to snap a few pics along the way has saved me a lot of frustration!
 

Upcoming Events

Teen Rifle 1 Class
Springfield, OR
Kids Firearm Safety 2 Class
Springfield, OR
Arms Collectors of Southwest Washington (ACSWW) gun show
Battle Ground, WA

New Resource Reviews

New Classified Ads

Back Top