Bronze Lifetime
- Messages
- 674
- Reactions
- 282
I have some experience with this process having been trained to work on the platform while I was an armorer in the military. I have built a number of guns for myself and for friends and co-workers. However, what I have not done is talk about the process before.
I have been in the planning stages of another build for some time. So attached is the first 'journal' entry I made regarding this build. If there is any interest (posted comments) I will continue to update the post with the process and photos.
Thought this might be a good learning tool for anyone considering building a pistol. I have done this process a few times and each time it is different. On this one I made some "make it easy" choices, like having the frame slide fit by Caspian. I also am trying my first build in .40 S&W and using my first Wilson/Nowlin ramped barrel. So it will be a learning process for me as well.
Hope you will join me.
Caspian .40 S&W 1911 build log:
24 March (unknown how much time wasted here), have been planning this build for some time and setting aside a few dollars to try and get the ball rolling and of course thinking about the concept of what the pistol should be. Thought about building an STI double stack with rail but finally settled on a more classic pistol (that fits all of the holsters I already have).
I did a spread sheet to keep track of everything and of course that does the math for you as you change things and modify the plan. The total tips the budget at just over $1300. Could have just bought the new Sig in .40 for way less and hit the range you say, not much satisfaction in that though.
Today was the day to get all the parts on order. Caspian/Foster will be the source for the stainless frame and slide, some machine operations, rear sight, front sight, ejector, hammer strut and mag catch. In addition they will fit frame/slide and carbonize as well as flat top and serrate the slide, do the cuts for sights and ball end cut the front of the slide. I have fit the previous frame/slide sets I have purchased from Caspian but the carbonize treatment sounds like a plus so I decided to go for it (lots of time saved here as well).
All of the other parts were sourced from Brownell's and read like a laundry list but the highlights are: Kart easy fit 5" barrel with W/N ramp (Caspian did that cut also), Wilson beavertail, S&A MSH, Cylinder & Slide fire control and all the other little goodies.
March 29, all the parts sourced from Brownell's arrived, everything looks good, waiting is the hardest part after the go button is pushed.
June 1, the frame/slide and other parts shipped from Caspian.
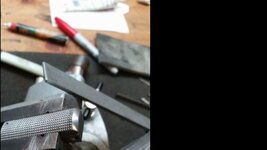
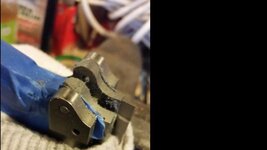
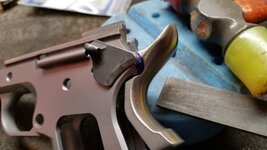
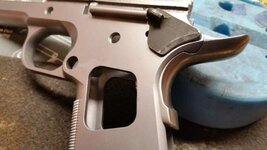
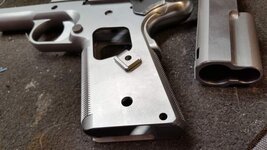
June 6 (20-30 min), had some free time (frame/slide still not here) but decided to cut the MSH for round butt fit. I prefer the look of the rounded MSH rather than a sharp corner. It also helps on a gun that will be carried and prevents clothes from hanging up on the butt of the gun. I also knocked the sharp points off the 20lpi checkering. The S&A part appears to be very well made and as expected the internals dropped right in.
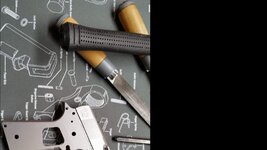
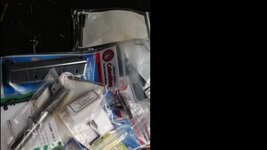
Pic of the parts pile.

The start of the MSH

I have been in the planning stages of another build for some time. So attached is the first 'journal' entry I made regarding this build. If there is any interest (posted comments) I will continue to update the post with the process and photos.
Thought this might be a good learning tool for anyone considering building a pistol. I have done this process a few times and each time it is different. On this one I made some "make it easy" choices, like having the frame slide fit by Caspian. I also am trying my first build in .40 S&W and using my first Wilson/Nowlin ramped barrel. So it will be a learning process for me as well.
Hope you will join me.
Caspian .40 S&W 1911 build log:
24 March (unknown how much time wasted here), have been planning this build for some time and setting aside a few dollars to try and get the ball rolling and of course thinking about the concept of what the pistol should be. Thought about building an STI double stack with rail but finally settled on a more classic pistol (that fits all of the holsters I already have).
I did a spread sheet to keep track of everything and of course that does the math for you as you change things and modify the plan. The total tips the budget at just over $1300. Could have just bought the new Sig in .40 for way less and hit the range you say, not much satisfaction in that though.
Today was the day to get all the parts on order. Caspian/Foster will be the source for the stainless frame and slide, some machine operations, rear sight, front sight, ejector, hammer strut and mag catch. In addition they will fit frame/slide and carbonize as well as flat top and serrate the slide, do the cuts for sights and ball end cut the front of the slide. I have fit the previous frame/slide sets I have purchased from Caspian but the carbonize treatment sounds like a plus so I decided to go for it (lots of time saved here as well).
All of the other parts were sourced from Brownell's and read like a laundry list but the highlights are: Kart easy fit 5" barrel with W/N ramp (Caspian did that cut also), Wilson beavertail, S&A MSH, Cylinder & Slide fire control and all the other little goodies.
March 29, all the parts sourced from Brownell's arrived, everything looks good, waiting is the hardest part after the go button is pushed.
June 1, the frame/slide and other parts shipped from Caspian.
June 6 (20-30 min), had some free time (frame/slide still not here) but decided to cut the MSH for round butt fit. I prefer the look of the rounded MSH rather than a sharp corner. It also helps on a gun that will be carried and prevents clothes from hanging up on the butt of the gun. I also knocked the sharp points off the 20lpi checkering. The S&A part appears to be very well made and as expected the internals dropped right in.
Pic of the parts pile.
The start of the MSH
