JavaScript is disabled
Our website requires JavaScript to function properly. For a better experience, please enable JavaScript in your browser settings before proceeding.
If I knew how to weld I'd probably do the same.

Was also trying to think about the Home Depot buckets they use in the parking lot with a little cement and a post in it. But I want to be able to remove the post when breaking down and taking home. Still think it's going to be too heavy though.

How about sinking a piece of PVC pipe in it slightly higher than the level of the cement? Then you could just drop a piece of 1x1 or whatever size you want to use for your post in it and staple the target to that
 
How about sinking a piece of PVC pipe in it slightly higher than the level of the cement? Then you could just drop a piece of 1x1 or whatever size you want to use for your post in it and staple the target to that

I thought about that. I was even thinking you could put a smaller pipe and a larger pipe side by side... so you could use a small stake for paper target stands or a large post for hanging steel on it. My only worry is that if/when the pvc breaks then you're kind of SOL.

I'd prefer to figure out how to make it "FIT" to a 4x4 so it could be taken out for breakdown. But considering the weigh... I think I'll just stick with the design I have.
 
I'd prefer to figure out how to make it "FIT" to a 4x4 so it could be taken out for breakdown. But considering the weigh... I think I'll just stick with the design I have.

I was thinking about using 4x4 as well. Not sure If I want to use wood post or steel tube.

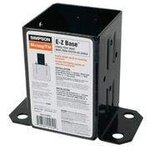
For 4x4, you can use 4x4 post base ($17.xx)
fyVMtP8A.jpg
 
I was thinking about using 4x4 as well. Not sure If I want to use wood post or steel tube.

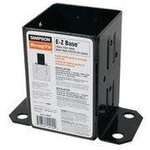
For 4x4, you can use 4x4 post base ($17.xx)
fyVMtP8A.jpg

I saw those too on my last reconnaissance trip to Home Depot. For me the whole idea of making your own portable target stand has to meet certain criteria.

1.) Stability / Versatility
2.) Size (Break down "ability"
3.) Cost

That 4x4 post support takes a huge chunk out of MY cost standards. Considering the one I posted cost about $10.00

I don't even know if the concrete in a bucket would work out because of the end weight of the thing compared to the wooden structure.
 
It does cost a lot. Because I will need two of them. For top and bottom. Also unless it's stationary, 4x4 is little over kill for carrying around.

I might end up using steel tubes.
 
My only worry is that if/when the pvc breaks then you're kind of SOL.

Think about that statement
You placed it in concrete
Now you still have a hole in the concrete;)

So really.all you need is the PVC to the top of the bucket then use a smaller pipe for the riser.
And hey,if you shoot better,you wont hit the pvc,no?:cool:
 
Think about that statement
You placed it in concrete
Now you still have a hole in the concrete;)

So really.all you need is the PVC to the top of the bucket then use a smaller pipe for the riser.
And hey,if you shoot better,you wont hit the pvc,no?:cool:

the idea suggested was to use a small amount of concrete (to reduce the overall weight) and to have a length of PVC sticking out of the concrete to support the post. So... now my statement should make more sense to you. Because if the section sticking out breaks then you won't have any support... and then you'd have to dig out the PVC. not impossible, but a pain. And yes, you would have a hole in the concrete but if it's for a PVC pipe (which is round) that is big enough to put a 4x4 post in(which is square) , then it's not going to support the post without the pipe.
 
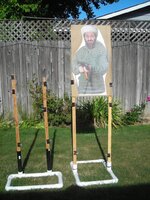
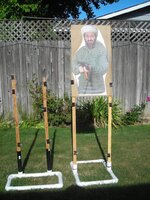
Here are my stands. The one on the left seems to topple over easier if there is a breeze.

targetstand.jpg

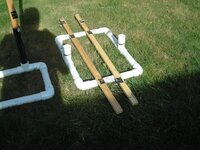
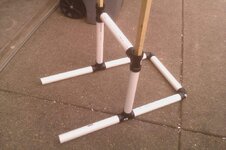
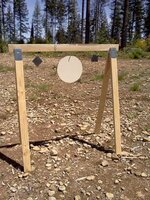
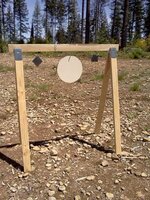
I like this style a little more than the wood stands. The only thing i personally wouldn't like is it being glued together, but the flat profile of them makes up for that i'd think. I'm stealing your paper clip idea (not that its completely original, but :s0155:). I'd really like to keep them as light weight as possible, so no concrete and limited lumber involved. I think the style i posted with some improvemens from kevs stand is going to do be the most light weight, easy to disassemble, and packable (?) out of the styles i've seen so far. If you're worried about wind with the PVC stands, the youtube how-to i watched added hold-down stake holes to two of the legs of the stand, that could be pinned down in high wind.
IMAG0502.jpg

I took my stand out shooting yesterday...it worked great! I read some concerns about hitting the cross-member, but the cardboard the target is stapled to is more than 2 feet above the upper cross-member. The only thing i hit was the 1x2 uprights a couple of times from being a horrible offhand shooter. The complete stand (sans uprights) fits in an adidas duffle bag along with all my ammo/tools/gear, slips together in less than a minutes, and was very very sturdy, even without glue.
 
Here's what I made yesterday to hang some plates:

platestand.jpg

1 pair sawhorse brackets from Bimart $5.97
3 2x4's at $2.50 each, cut in half
1 hook for the big plate, $.99
3 eyes for the small plates $1.98
a few sheetrock screws I had in the garage to screw the legs to the brackets.

The legs aren't screwed to the cross piece so it comes apart for transport

I could clamp or screw some 1x2 vertically to the cross piece for paper targets.
 
Zepoll,Sure you're right,I guess.wasn't trying to belittle in any way.

jdubl,how about some sound bags or inside on those windy days? Dump it out after?

PDX,I think you just won. Comes apart in seconds huh? Staple some cardboard on the cross board when you want to shoot paper,or the steal you have there.
Simple and easy,I like it
 
Here's what I made yesterday to hang some plates:

platestand.jpg

1 pair sawhorse brackets from Bimart $5.97
3 2x4's at $2.50 each, cut in half
1 hook for the big plate, $.99
3 eyes for the small plates $1.98
a few sheetrock screws I had in the garage to screw the legs to the brackets.

The legs aren't screwed to the cross piece so it comes apart for transport

I could clamp or screw some 1x2 vertically to the cross piece for paper targets.

You answered one of my questions....

I have this same set up standing up potatos (on top) and was looking at hanging plates from it. I was originally going to use gate hinges to hang the plates, then thought about screwing a hook into the front of the 2x4 but I like your idea of screwing it in from the bottom better.

Inspired. :)
 
Zepoll,Sure you're right,I guess.wasn't trying to belittle in any way.

jdubl,how about some sound bags or inside on those windy days? Dump it out after?

PDX,I think you just won. Comes apart in seconds huh? Staple some cardboard on the cross board when you want to shoot paper,or the steal you have there.
Simple and easy,I like it

I was planning on shoving some rocks in the tubes if it became an issue.

I like PDX's stands a lot too. It seems like you can custom cut the legs to fit whatever space you have to haul them in. I'll be making at least one of them to add to my trunk'o'fun in the next week or so. Heading to the show tomorrow, hope you guys didn't buy everything already!
 
Great thread,

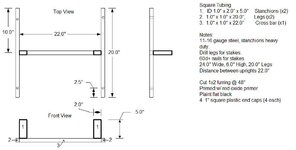
For the DIY'ers:

I drew this up 7 years ago, thought I would make a million. :s0114:
Made 5, welds still holding together, and no one has put a round in them yet.

I use stakes for heavy winds, less liability with ricochets (instead of using rocks).
Only thing I have changed is welding a washer about an inch down from the top of the stake to aid pulling out the stake.
Free to use, but if you make a million, give some to this site and a pro-gun organization.

target stand.jpg

All the best,
Steve (new guy trying to contribute)

target stand.jpg
 
Last Edited:
I figured out a design for about the smallest target stand I've ever seen, but have been unable to find the rectangular tubing the right size to build it. The system is composed of cheap standard wooden lath, either thick (approx 1"x5/8") or thin (approx 1"x3/16") and two "connectors". I don't have a sketch but the description is pretty straightforward.

To make the two "connectors":

1. Take three pieces 4-6" long of rectangular tubing (either steel or PVC) that fit your lath firmly (if it doesn't hold the lath firmly the target becomes unwieldy and unsteady).

2. Weld the three pieces together at 90deg angle to each other. i.e. one at right angles to the first and the last sticking straight up. Do this twice to make two "connectors".

3a. slide a 2-3' piece of lath through the bottom piece of each connector, this is the "feet".
3b. slide a 18"-24" piece into the next piece and across to the other "connector". This is the frame width.
3c. slide two pieces of lath through the vertical pieces. This is your target stand uprights.

That's it! Caveman simple. Quick to put up and take down. Cheap. Versatile. Easy to repair. Breaks down into small pieces for easy transport. You can customize the width, height and foot length (for steadiness) by simply using longer or shorter pieces of lath.

After a few years of rumination I've even figured out a few subtle things to make the design work better. But have never been able to build a test model.

Its such a dang sweet idea, BUT . . .

Only trouble is, even after calling around to NUMEROUS steel and PVC suppliers, I never could find a rectangular tubing in the right size. As I mentioned, the connector pieces must hold the lath FIRMLY or the whole thing just becomes a rickety mess.

So I dropped the idea.


Anyone finding a solution to my tubing size dilemma, please post it here and become an instant hero!

This is great and everything but then your idea requires a guy be able to weld or have access to welding gear. Not saying my idea is the best by any stretch but all a guy has to do is be able to slide his debit card at the local Home Depot, cut some PVC to length, and push it all together. You can put a stand together like mine in five minutes or less.
 
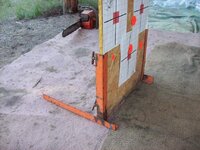
Here is what I came up with but then I do have welding/metal working equipment. Basically a couple of angel iron sections welded in the configuration and four metal tabs welded on the insides of the uprights with holes drilled in them, nuts welded on and four bolts with short sections of flat stock welded on the create 'wingscrews' The up side is any size sheet of plywood can be used and when the stands are removed they store flat and take up little room.
stand.jpg

stand.jpg
 
For years I tried to come up with ideas just like all the others that I have seen here. A couple of years back I had an epiphany. So now when I head to the hills to set up my temp. range for practice I bring along a few of these.


d0c0f208-8889-4d05-b6c4-faefe0924264_300.jpg

Just unfold, add ballast (a small chunk of wood works great), staple on paper targets and get to shooting. They fold up flat for easy transport. Are stack-able and available in many sizes. They are completely recyclable or can be burned up at the campfire.

No more lugging around heavy bases (unless I'm shooting at my steels).

Just an idea. :s0155:
 

Upcoming Events

Centralia Gun Show
Centralia, WA
Klamath Falls gun show
Klamath Falls, OR
Oregon Arms Collectors April 2024 Gun Show
Portland, OR
Albany Gun Show
Albany, OR

New Resource Reviews

New Classified Ads

Back Top