JavaScript is disabled
Our website requires JavaScript to function properly. For a better experience, please enable JavaScript in your browser settings before proceeding.
:s0093: Still waiting on that lock I bought on e-bay. In the meantime I'll pick up a set of small chisels from Harbor Freight. I think I'd like to try some inlays on this stock. Thinking of either a tiger, or a dragon. Ace Hardware has thin brass like I used for barrel bands on my Matchlock. :)
 
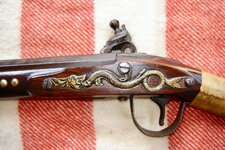
A serpent side plate is always interesting.
Andy
DSC06834.jpg
 
Thanks Andy,
I notice how they incorporate the screw holes into the design to help hold the inlay in place. I would have to keep the design relatively simple :s0155:
That's one way to look at it alright. I believe that its most common purpose was to act like a washer for the lock screws that penetrated the stock. It is in the shape of a serpent or dragon because it is cool and also because it was accepted as a sign of the authenticity and quality of the gun by many Indians in the fur trade.
 
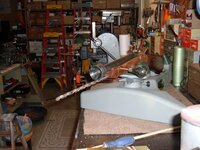
Well BUMMER !
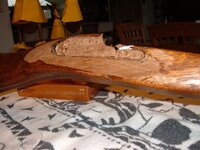
I broke a large chip out of my stock as I was cutting out for the lock. :(
Now I'll have to wait for the glue to dry before continuing. It's time to
mask up and go back to the Dremel Tool. :s0138:
Inlet Stock.jpg
 
Last Edited:
Cool project. Like most I lack the tooling to do this, but have had my eye on the brass blunderbuss that Loyalist Arms in Canada will ship to me. I already have a pair of their Murdoch .52 caliber cannon muzzle pistols that I had to drill the flash holes out to make them operational. You likely know this but the muzzle needs to be flared for easier loading.. how will you do that?
 
Cool project. Like most I lack the tooling to do this, but have had my eye on the brass blunderbuss that Loyalist Arms in Canada will ship to me. I already have a pair of their Murdoch .52 caliber cannon muzzle pistols that I had to drill the flash holes out to make them operational. You likely know this but the muzzle needs to be flared for easier loading.. how will you do that?
Check back to the beginning of the thread and you can follow it through. :s0093:
 
I, "Sharpened up my ax" and got back to work. Thank goodness for Popsicle sticks and Elmer's Glue.:rolleyes:
When everything, "Fit", I reached a screw driver up through the trigger hole to trip the sear and fired a cap to check hammer alignment.:s0023::s0023::s0023: IT LIVES !:s0001:

Now to work on a trigger and trigger guard. After that...Decorations. :s0155:

Lock-1.jpg
Lock-2.jpg
 
Well BUMMER !
I broke a large chip out of my stock as I was cutting out for the lock. :(
Now I'll have to wait for the glue to dry before continuing. It's time time to
mask up and go back to the Dremel Tool. :s0138:
View attachment 817034
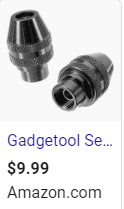
Speaking of Dremel tool: In case others are as out of touch as I was; for fifty years I have been less then enthralled with the collet system used on the Dremel since I'm constantly trying to stuff in micro drills and things that don't quite fit the collets sizes. Just recently found out a tiny keyless three jaw chuck was available so For ten bucks, free shipping, (along with a nearly foot and a half square mailer packaging) though I only needed one, I got two (2) . (couldn't find just one this cheap elsewhere)
I wished I had one decades ago. it works great! (it is possible to teach an old dog new tricks)
1612312274288.png
 
I've made a number of small parts the last few days, barrel pin escutcheons, Ram Rod tube, trigger and trigger plate. :)
I got lucky with the trigger and it worked the first time.:s0155:

Then I ran out of brass and had to temporarily install a the trigger guard I had broken.:rolleyes:
It's been laying around my bench for a while looking for a home. It looks good, but I can only attach it at one end.:(

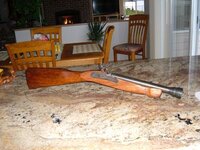
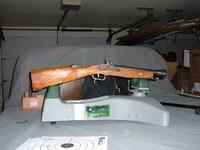
Still a work in progress, but .........Here she is....:s0093:

Completed.jpg
 
I've made a number of small parts the last few days, barrel pin escutcheons, Ram Rod tube, trigger and trigger plate. :)
I got lucky with the trigger and it worked the first time.:s0155:

Then I ran out of brass and had to temporarily install a the trigger guard I had broken.:rolleyes:
It's been laying around my bench for a while looking for a home. It looks good, but I can only attach it at one end.:(

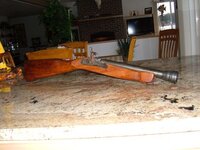
Still a work in progress, but .........Here she is....:s0093:

View attachment 823720

I LOVE IT!

The important thing at this point is getting it firing, then you can get it all fancy. Super cool! :D
 
I got to looking a little more at that old trigger guard. :s0093:
It needed to set down into the stock to stay in place, so I shortened the trigger plate.:s0001:

Then, with a popsicle stick shim and some Elmer's glue, it bedded right down.:s0155:

Maybe shoot it tomorrow.:s0023::s0023:
 

Upcoming Events

Redmond Gun Show
Redmond, OR
Klamath Falls gun show
Klamath Falls, OR
Centralia Gun Show
Centralia, WA

New Resource Reviews

New Classified Ads

Back Top