Bronze Supporter
- Messages
- 639
- Reactions
- 218
- Thread Starter
- #21
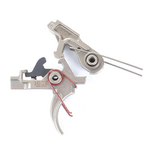
Schmidt 2 stage
Follow along with the video below to see how to install our site as a web app on your home screen.
Note: This feature may not be available in some browsers.
Punch set? What is that?Nice. Order yourself a punch set and you're ready to go.
For myself, I ended up with some extra pins along the way. I cut one down to 3/4 size with a Dremel and use it as a guide pin. Not really needed with drop in cassette trigger.Pins or drift punches for dis assembly? Do I need special tools to install the trigger?
Wow....thanksGeneral Tools SPC75 Drive Pin Punches, Set of 8 , Grey https://a.co/d/0EzzQ9V
Something like this for pushing the pins out. You can opt for a brass set if you don't want to scratch the finish on your pins. Then I take the tightest fitting pin, 5/32 to hold the trigger in place as a slave pin. This will keep everything aligned when you push or tap the pin back in.

You are so nice to Wright up the procedure...thanks....wish you were closer...View attachment 1388289
Most of these moves I'm going to be descriping like you're sitting at the kitchen table with the rifle laid with the stock to the left and the barrel to the right. I'm a Catholic right handed and I assume no one is sin-handed. Just kidding. You'll want to face it in whatever direction away from which hand you are going to pin with. And toward the hand you'll use to wiggle things into place.
1. Arrange your springs like this.
2. Remove your grip carefully in a direction where you won't loose the springs and detents that are sandwiched between your grip and lower.
3. Remove safety selector
4. Lower the trigger down into the pocket oriented with the rear tail of it lower than the front and slightly behind where it looks like it should go. The trigger hook itself will be pointing towards the hole, but only barely lined up JUST enough to thread into the hole. This is so the springs lay forward and flat and don't bind on insertion.
5. Poke your finger down onto the disconnect sear ( the extra hook part that is loose in your trigger) and look through the holes on the side of your receiver until they are lined up. Stick the best fitting punch through the left side (if you're right handed) to keep it all lined up. This is called a slave pin. I hole the pin tip lined right up with my left hand finger tip so when I feel around for the hole, I can feel where the pin is too.
6. With your left hand wiggle the slave pin left so it's still in the receiver hole, but exposes a ledge for you to stick the replacement pin in. Tap it in lightly, while keeping positive, but less pressure on the slave side so it doesn't bounce out. You can kind of "steer" the holes to stay lined up with the slave pin, but don't crank on it too hard or you'll egg out your pin holes. Tap tap taparoo.
7. You're gonna do the same for the hammer, but when you insert it, you're going to want to hold it leaning forward at about 45 degrees. Put the two legs of the hammer spring to contact the receiver floor behind the trigger pin.
8.youll have to rotate the hammer forward into a vertical position at the same rate you lower the holes to line up with your receiver hole. The point of this hammer insertion ballet, is that the legs of the hammer spring have to be on top of the hammer pin and facing backwards under tension. This one is going to want to stay put even less than the first one. Hold it down and forward and manipulate the position until the holes are lines up. Repeat the slave pin process. This one is going to want to move on you more so pay attention that you're not letting the slave pin get angled and pushed around too much by the tension. Also there is a keeper spring in the center of your hammer, you have to just push through it.
9. Youll know the springs are right if the two legs of the hammer spring rest on the two notches in the trigger pin and the center notch has "clicked" in when you have the hammer pin in.
10. Reinsert the safety selector with the hammer up. Try not to let the hammer slap the front of the receiver too much, I use a pencil eraser as a little bumper. The safety won't go in with the hammer cocked
Will do, and I will take all the help I can getIf you have trouble let TTSX help ya out, it's always good to make friends and help out dudes in your community.
Can't ban knowledge. I do 80% build tutorials up here. When I set up my new shop I'll be doing cetmes too. Hopefully Aks as well. I have so many parts kits. Post pictures of you get stuck/ when you're done.