- Messages
- 274
- Reactions
- 106
A couple of months ago I asked here, and on the 1911 Forum, if anyone had detail stripped a Kimber Solo Slide, and nobody had. I wanted to strip it in order to send out the bare slide for Cerakoting in black --because I like all-black carry pistols, and Kimber doesn't yet make the Solo in all-black. I was cautious because I had no directions to go by, and because I was a little apprehensive about removing the small roll pins.
After no responses, I decided to go ahead on my own, and took a few pictures to help me reassemble it: presented here in case you want to detail strip your own Kimber Solo Slide.
First, the finished product; back from Mike Galmukoff at Northwest Gun Refinishing and reassembled: and yes, the slide is a flatter black than the Kimpro gloss finish on the aluminum frame, just the way I wanted it. Color is Armor Black. I did the Slide, the front of the Recoil Guide Rod, Extractor, and the Striker Stop which is the back of the slide --and could not be happier. I could have Duracoated it myself, but opted to send it out to be Cerakoted for the added durability.

Now a few pictures of the detail strip: be familiar with the Parts Diagram in the Kimber Solo Manual for parts nomenclature.
#1 Remove back of Slide, called Striker Stop by: 1st push down on the Striker Stop Lock with one tool while using a 2nd tool like a screwdriver, to pull back the Plunger to clear the Striker Stop. Remove Striker Stop.

#2 Next use a tool to push down on the Striker Stop Lock and pull out the Plunger and Firing Pin Spring.

#3 Pull out the Striker Stop Lock Pin, wiggling the Striker Stop Lock helps, remove Striker Stop Lock and Spring.

#4 Shake out the Block Limit Pin, then remove the Firing Pin Block w/Spring.

#5 Now it's time to remove the 2 roll pins. Drive them down from the top thru the provided holes. I found I had to reduce the diameter if a 1/16" pin slightly to fit the holes.

#6 Larger pin comes out to release the Firing Pin and the tiny Return Spring

#7 Smaller pin comes out to remove the Extractor and Extractor Spring.

I also melted the front of the slide before sending it to be Cerakoted.
Reassembly is done be reversing all the above. The only difficulty I had was replacing the Striker Stop Lock --you need three tiny hands to push town on the Striker Stop Lock Spring with the Striker Stop Lock while inserting the Striker Stop Lock Pin, but after several tries I finally got it. Sight removal and replacement was done with a massive Meprolight sight pusher, but any good sight pusher will work.
This process worked for me without any issues; if you try it, have proper tools, and understand what you're doing before starting. Based on my experience, it's fairly easy. I ended up with a one-of-a-kind all black Kimber Solo. Yes, I know I did not detail strip the frame in order to remove the trigger to have it Cerakoted black too. I'll save that for another time! (more roll pins!)

I am very pleased with the work that Mike Galmukoff at Northwest Gun Refinishing (Sponsor here on the Forum) did in Cerakoting my slide and small parts. Because he was pretty backed up with work, I reserved a spot a month in advance for the week of December 3rd. Sent the slide to him the Friday before, and he had the Cerakoting done and the slide back to me in exactly 7 days from the day it left; great service at a reasonable price.
After no responses, I decided to go ahead on my own, and took a few pictures to help me reassemble it: presented here in case you want to detail strip your own Kimber Solo Slide.
First, the finished product; back from Mike Galmukoff at Northwest Gun Refinishing and reassembled: and yes, the slide is a flatter black than the Kimpro gloss finish on the aluminum frame, just the way I wanted it. Color is Armor Black. I did the Slide, the front of the Recoil Guide Rod, Extractor, and the Striker Stop which is the back of the slide --and could not be happier. I could have Duracoated it myself, but opted to send it out to be Cerakoted for the added durability.
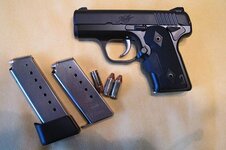
Now a few pictures of the detail strip: be familiar with the Parts Diagram in the Kimber Solo Manual for parts nomenclature.
#1 Remove back of Slide, called Striker Stop by: 1st push down on the Striker Stop Lock with one tool while using a 2nd tool like a screwdriver, to pull back the Plunger to clear the Striker Stop. Remove Striker Stop.
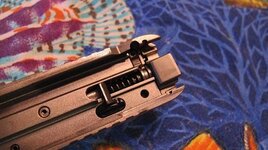
#2 Next use a tool to push down on the Striker Stop Lock and pull out the Plunger and Firing Pin Spring.
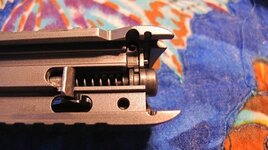
#3 Pull out the Striker Stop Lock Pin, wiggling the Striker Stop Lock helps, remove Striker Stop Lock and Spring.
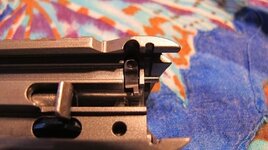
#4 Shake out the Block Limit Pin, then remove the Firing Pin Block w/Spring.
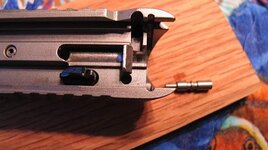
#5 Now it's time to remove the 2 roll pins. Drive them down from the top thru the provided holes. I found I had to reduce the diameter if a 1/16" pin slightly to fit the holes.
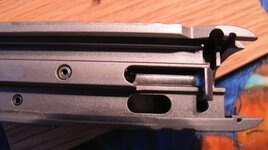
#6 Larger pin comes out to release the Firing Pin and the tiny Return Spring
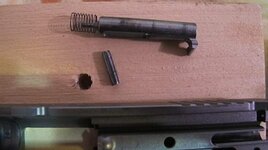
#7 Smaller pin comes out to remove the Extractor and Extractor Spring.
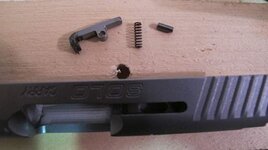
I also melted the front of the slide before sending it to be Cerakoted.
Reassembly is done be reversing all the above. The only difficulty I had was replacing the Striker Stop Lock --you need three tiny hands to push town on the Striker Stop Lock Spring with the Striker Stop Lock while inserting the Striker Stop Lock Pin, but after several tries I finally got it. Sight removal and replacement was done with a massive Meprolight sight pusher, but any good sight pusher will work.
This process worked for me without any issues; if you try it, have proper tools, and understand what you're doing before starting. Based on my experience, it's fairly easy. I ended up with a one-of-a-kind all black Kimber Solo. Yes, I know I did not detail strip the frame in order to remove the trigger to have it Cerakoted black too. I'll save that for another time! (more roll pins!)
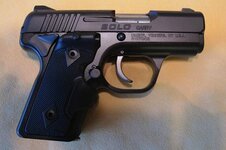
I am very pleased with the work that Mike Galmukoff at Northwest Gun Refinishing (Sponsor here on the Forum) did in Cerakoting my slide and small parts. Because he was pretty backed up with work, I reserved a spot a month in advance for the week of December 3rd. Sent the slide to him the Friday before, and he had the Cerakoting done and the slide back to me in exactly 7 days from the day it left; great service at a reasonable price.


