JavaScript is disabled
Our website requires JavaScript to function properly. For a better experience, please enable JavaScript in your browser settings before proceeding.
Messages
12,645
Reactions
21,586
Note: A standard die is 7/8-14 threads, so figuring out how much the die moves up and down by revolution is technically possible, thread tolerances notwithstanding.

The problem is 2 fold.....
1) Is elevating the die directly proportional to the amount of shoulder bump you need? E.g.: if you need to bump the case shoulder .003" can you just turn the die .003"? My guess is probably not.
2) Most full length dies will size the case well under the SAMMI minimum (to fit all chambers) so the real dilemma here is finding out what your die produces then backing off from there. Is the best way to do this to just FL size one case, measure the case datum (case headspace) then back the die off (in thousandths) by the difference from what you want the shoulder to be?


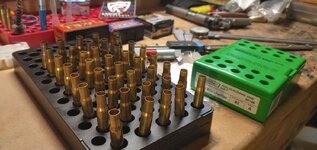
messy reloading bench pic for attention...
nnnnn.jpg
 
Take a fired case and bring the sizing die down to the point it just touches the shoulder. This is your baseline. Now remove the brass and place it in a shoulder comparator that fits in your calipers. Measure to base to mid shoulder. Write that number down. Now put brass back in sizing die and size it with 1/8 of a turn down. Put back in comparator and measure. When it is 0.003" shorter, you are done.
If 1/8 increments are not accurate enough for you (and you should be using locking rings), then buy a die that has micrometer adjustments, although as far as I know, these are only meant for bullet seating.

BTW, why in the world would you be doing this for 30-30? This is more of a precision rifle concern unless you were previously under-headspacing and stressing your brass.
 
Last Edited:
Take a fired case and bring the sizing down to the point it just touches the shoulder. This is your baseline. Now remove the brass and place it in a shoulder comparator that fits in your calipers. Measure to base to mid shoulder. Write that number down. Now put brass back in sizing die and size it with 1/8 of a turn down. Put back in comparator and measure. When it is 0.003" shorter, you are done.
If 1/8 increments are not accurate enough for you (and you should be using locking rings), then buy a die that has micrometer adjustments, although as far as I know, these are only meant for bullet seating.

BTW, why in the world would you be doing this for 30-30? This is more of a precision rifle concern unless you were previously under-headspacing and stressing your brass.
This sounds like a plan but how can you tell when the die just touches the shoulder when the case starts being sized before it gets there?


...the less stress on the brass the longer its life. I admit Im not as concerned with the 30-30 but Im learning this for my other rifles I load for.
 
This sounds like a plan but how can you tell when the die just touches the shoulder when the case starts being sized before it gets there?


...the less stress on the brass the longer its life. I admit Im not as concerned with the 30-30 but Im learning this for my other rifles I load for.
Oh I see what you mean; put some candle smoke on the shoulder of the case and when it's just starting to rub off, you are there... go in small increments.
 
Take a fired case and bring the sizing die down to the point it just touches the shoulder.
I dont think this is going to work for me as I cant find when it touches the shoulder and when the die is backed off that far at first it actually stretches the shoulder datum.
What Im trying now is to fully seat the die as normal and measure the shoulder on the first case, then back the die off in thousandths from there... kinda the opposite direction from what your doing. The down side is the first case will be different than the rest but I will write this number down....
 
Full length size the case with the bottom of the die just bumping the shell holder.

Measure that and write it down. Now just back the die off the correct amount that equals your .003" bump from a fired case.

Measure a fired case and your fully sized case to know how far to back off the die. That should get you pretty close. Fine tune from there.
This did it. I was able to quickly set the die to the correct shoulder bump and it stayed consistent. Ive struggled with being consistent doing this in the past but what I learned tonight is to tighten the lock ring by hand so I can still turn the die without moving the ring, then lock the ring once the die is in its new position. The Forster Accu Ring helps...
 
This did it. I was able to quickly set the die to the correct shoulder bump and it stayed consistent. Ive struggled with being consistent doing this in the past but what I learned tonight is to tighten the lock ring by hand so I can still turn the die without moving the ring, then lock the ring once the die is in its new position. The Forster Accu Ring helps...
Another tip that I've found that helps is to mark the lock ring and top of the press to align them. So each time you go to resize again you shouldn't have to redo everything. I only load 2 rifle cartridges on my press these days so I have 2 color sharpie marks on things to worry about. Might be a bit more complicated thing to do if you have multiple cartridge dies.
 
Another tip that I've found that helps is to mark the lock ring and top of the press to align them. So each time you go to resize again you shouldn't have to redo everything. I only load 2 rifle cartridges on my press these days so I have 2 color sharpie marks on things to worry about. Might be a bit more complicated thing to do if you have multiple cartridge dies.
Do you mean leave the lock ring clamped in position on the die, then just thread till it seats tight? Ideally this seems like it would work and a quick setup...
 
Do you mean leave the lock ring clamped in position on the die, then just thread till it seats tight? Ideally this seems like it would work and a quick setup...
Yes, mark the die on the lock ring, if you use lock rings that clamp onto the die and don't budge like the Hornady ones, and a corresponding mark on the top of the press.
 
Yes, mark the die on the lock ring, if you use lock rings that clamp onto the die and don't budge like the Hornady ones, and a corresponding mark on the top of the press.
I'll give this a try on the next loading. I tried but my lock ring wasnt as tight as I thought and I lost me zero. But this sounds like the way to go... Thanks for the tip.
 
I'll give this a try on the next loading. I tried but my lock ring wasnt as tight as I thought and I lost me zero. But this sounds like the way to go... Thanks for the tip.
I usually wrench my dies down a bit, so I can wrench into alignment VS hand tightening. I found it keeps my measurements repeatable this way.
 
I usually wrench my dies down a bit, so I can wrench into alignment VS hand tightening. I found it keeps my measurements repeatable this way.
The problem Im running into is when I wrench the lock ring to the press then I cant rotate the die by hand to fine tune it or back it off to set the shoulder bump. So then I just tighten the lock ring by hand, but this time I forgot to tighten the lock rings set screw tight enough. Next time I will and then use channel locks to remove the die/lockring assembly from the lock ring.
If that makes sense...
Totally makes sense. It took a minute to get my sizing die set up. I initially set it slightly further out and then messed around wrenching it down till it was at the right dimensions. I've donei marked it and now it returns pretty much the same give it take a few thousandths.
 
Do you mean leave the lock ring clamped in position on the die, then just thread till it seats tight? Ideally this seems like it would work and a quick setup...
Yes, mark the die on the lock ring, if you use lock rings that clamp onto the die and don't budge like the Hornady ones, and a corresponding mark on the top of the press.
1. Using the above method, try to use the same torque every time you lock down.

2. 7/8 dia shim washers from McMaster Carr 0.001- 0.020 make it pretty easy. Still need to watch torque.

3. Whidden Click sizing dies. ($$$$$$)
 
An1/8 turn is about 8-9 thousandths of an inch. You need to measure a fired case with a comparator, Preferably a few, to know you chamber size.

Screw a die in until it touches the shell holder with the ram fully up. Resize a case and measure the full die bump with a comparator. Decide how much you want to back it off. Reset the die by backing off the necessary amount. Try resizing another and repeat until you are where you want to be. Last, test the resized cases in you firearm to ensure they fit.

On a side note, 30-30 headspaces off the mouth. There is not a lot of leverage in a lever action so you want more generous clearance than you would use with a bolt action or semi auto. SAAMI allows up to 0.025" of clearance at the shoulder max and 0.017" min. That is significantly more than regular non rimmed bottle neck cases.
 
The .30-30 headspaces on the rim. It can be made to headspace off the shoulder if the reloader wishes (which for case life and accuracy is preferred).

Straight wall cases headspace off the mouth.
 
Last Edited:
It is not this hard. Set it like you set your bullet seater die but you are turning the whole die instead of the seating stem.

The preferred method for bulk reloading and repeatability between reloading sessions is use the Redding competition shell holder set.
 

Upcoming Events

Centralia Gun Show
Centralia, WA
Klamath Falls gun show
Klamath Falls, OR
Oregon Arms Collectors April 2024 Gun Show
Portland, OR
Albany Gun Show
Albany, OR

New Resource Reviews

New Classified Ads

Back Top