Bronze Supporter
- Messages
- 11,910
- Reactions
- 21,062
Posting this in case anyone wants to change the color of their knife scales. Tried this out using Rit dye according to the simple technique in this short video (I suggest ignoring all "luvthemknives" videos on the topic). Note that there is a good video on YouTube on how to make color gradients also. Just think of dyeing Easter eggs, it's basically the same.
I prepped scales by rubbing with 99% alcohol. Make sure to follow up immediately with dry rag to soak up the oils etc that are suspended in the alcohol when you wipe it down. Don't let alcohol dry after first rubdown, wipe off with dry cloth.
I soaked in lightly boiling 8:1 water to dye mixture for 30 seconds on the carbon fiber/green g10 one and 4 minutes on the all green g10 one. Saphire blue Rit synthetic dye used.
I suggest shorter is better than longer. Longer makes very dark and also overdoes it imo in the sense that there is too much dye inside the scale. When the outside dries some of that wet dye from inside seeps into the outside dye and makes inconsistencies. So you have to keep wiping to get any new dye coming to the top. I think if you do 30 seconds you won't have this problem and I got full penetration with only 30 seconds.
Keep in mind that the lighter color the scale is to start with the better it will be vs darker scales (based on utube videos and my personal experience painting cars anyway, not personal experience dying knives).
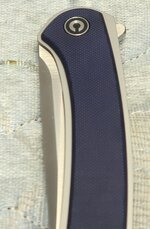
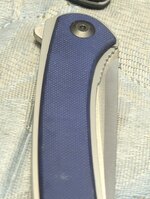
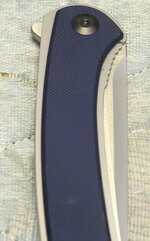
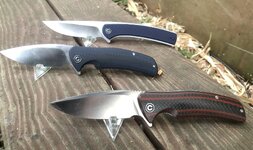
Here are some before and after pics. Light is horrible now so color probably not that perfectly accurate in pics. If we have sun all try to take more pics. In other words pay attention to colors not the quality of the photo plz.
Before: (note: photo taken in good sunlight)

After: (note: photo taken in poor light)

Before: (note: photo taken in nearly perfect light)

After: (note: photo taken in poor light)


Had about 1 min of sun. But hard to get accurate color w phone. Need to use real camera I guess.

I prepped scales by rubbing with 99% alcohol. Make sure to follow up immediately with dry rag to soak up the oils etc that are suspended in the alcohol when you wipe it down. Don't let alcohol dry after first rubdown, wipe off with dry cloth.
I soaked in lightly boiling 8:1 water to dye mixture for 30 seconds on the carbon fiber/green g10 one and 4 minutes on the all green g10 one. Saphire blue Rit synthetic dye used.
I suggest shorter is better than longer. Longer makes very dark and also overdoes it imo in the sense that there is too much dye inside the scale. When the outside dries some of that wet dye from inside seeps into the outside dye and makes inconsistencies. So you have to keep wiping to get any new dye coming to the top. I think if you do 30 seconds you won't have this problem and I got full penetration with only 30 seconds.
Keep in mind that the lighter color the scale is to start with the better it will be vs darker scales (based on utube videos and my personal experience painting cars anyway, not personal experience dying knives).
Here are some before and after pics. Light is horrible now so color probably not that perfectly accurate in pics. If we have sun all try to take more pics. In other words pay attention to colors not the quality of the photo plz.
Before: (note: photo taken in good sunlight)
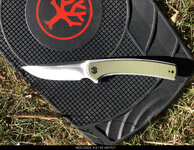
After: (note: photo taken in poor light)

Before: (note: photo taken in nearly perfect light)
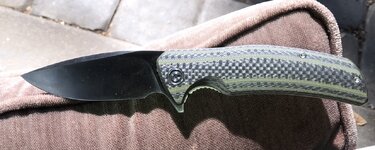
After: (note: photo taken in poor light)
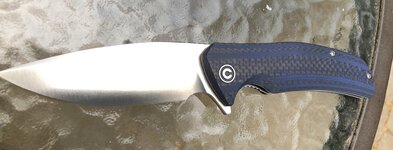
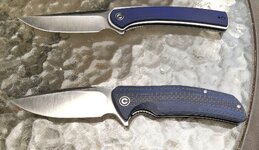
Had about 1 min of sun. But hard to get accurate color w phone. Need to use real camera I guess.
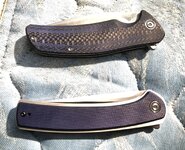
Last Edited:


