Bronze Supporter
- Messages
- 5,295
- Reactions
- 4,917
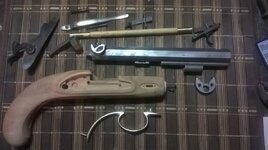
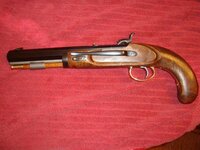
Here are some pics of a muzzleloader kit that I purchased from a NWFA member a while back.
Got it completely unfinished, as seen in the pics... bare wood, raw brass, all metal in the white...
Ive never done one of these before, but it wasnt too hard.
Basic Steps:
1. Assemble the gun, grind and sand where needed to get a good wood to metal fit
2. Disassemble and begin finishing the various parts.
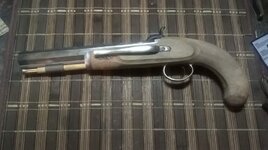
3. I started with the stock, I sanded to 220 grit, added a light coat of stain & sanded again with 220. Once dry, I applied several coats of boiled linseed oil, buffing with 0000 steel wool between coats.
4. The Brass took some work, sand with 220 and then to 320 grit. Buff with steel wool... then I used a Dremel with the buffing wheel and some compound.
5. All steel parts were sanded to 320 & I applied Brownells Classic Rust Blue several times to get the right look.
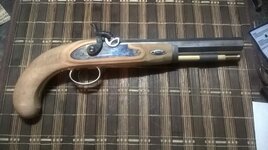
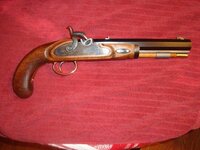
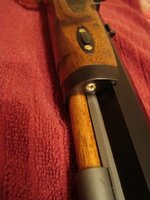
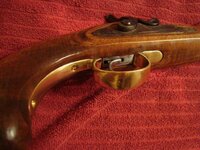
6. Reassemble and enjoy, I replaced the screws with brass screws. I liked the brass on brass of the trigger guard, but the contrast of brass on blue on the other areas. I also left the ramrod holder unfinished. I may blue it later but I like the look of it for now.
For the rust bluing, this was my first finishing attempt using anything other than a rattle can. Well not my first, I practiced on a cheaper kit gun I bought (for sale now on NWFA).
Its a pretty simple process. Basically sand the metal to no more than 320 grit, apply the solution, let it rust, boil it for several minutes, let it cool and then remove ('carding') the black rusty fuzz thats left behind and you can see the metal slowly turn that classic 'gun metal' color. It may take several times before it looks right. Its a slow process, but its a classic, durable finish that can be done without any special tools or equipment.
PICS!


More pics can be found here...
Got it completely unfinished, as seen in the pics... bare wood, raw brass, all metal in the white...
Ive never done one of these before, but it wasnt too hard.
Basic Steps:
1. Assemble the gun, grind and sand where needed to get a good wood to metal fit
2. Disassemble and begin finishing the various parts.
3. I started with the stock, I sanded to 220 grit, added a light coat of stain & sanded again with 220. Once dry, I applied several coats of boiled linseed oil, buffing with 0000 steel wool between coats.
4. The Brass took some work, sand with 220 and then to 320 grit. Buff with steel wool... then I used a Dremel with the buffing wheel and some compound.
5. All steel parts were sanded to 320 & I applied Brownells Classic Rust Blue several times to get the right look.
6. Reassemble and enjoy, I replaced the screws with brass screws. I liked the brass on brass of the trigger guard, but the contrast of brass on blue on the other areas. I also left the ramrod holder unfinished. I may blue it later but I like the look of it for now.
For the rust bluing, this was my first finishing attempt using anything other than a rattle can. Well not my first, I practiced on a cheaper kit gun I bought (for sale now on NWFA).
Its a pretty simple process. Basically sand the metal to no more than 320 grit, apply the solution, let it rust, boil it for several minutes, let it cool and then remove ('carding') the black rusty fuzz thats left behind and you can see the metal slowly turn that classic 'gun metal' color. It may take several times before it looks right. Its a slow process, but its a classic, durable finish that can be done without any special tools or equipment.
PICS!
More pics can be found here...


