JavaScript is disabled
Our website requires JavaScript to function properly. For a better experience, please enable JavaScript in your browser settings before proceeding.
I did a kydex pocket holster for my P32 - I wasn't sure how the heat gun would affect the gun and didn't know if the kydex would stick to the grip housing so I got a block of florist's foam and pressed the gun into it, pulled the gun out and had a pretty clean mold. I took some 20 minute mud for sheet rock repair and poured it into the mold - let it set up overnight (20 min or not) and used a heat gun to mold the kydex around the plaster casting. It worked great for a first try - Next try will include bonding leather to the outside for a more professional look. Now I need to find a local source for Kydex that isn't overly cost prohibitive.
 
I did a kydex pocket holster for my P32 - I wasn't sure how the heat gun would affect the gun and didn't know if the kydex would stick to the grip housing so I got a block of florist's foam and pressed the gun into it, pulled the gun out and had a pretty clean mold. I took some 20 minute mud for sheet rock repair and poured it into the mold - let it set up overnight (20 min or not) and used a heat gun to mold the kydex around the plaster casting. It worked great for a first try - Next try will include bonding leather to the outside for a more professional look. Now I need to find a local source for Kydex that isn't overly cost prohibitive.

Neat trick. I haven't heard of that process nor would I have thought of it. I'm still waiting for my order of kydex sheets to come in from knifekits.com. I have been reading up and watching lots of YouTube videos of the molding processes. Please continue sharing original ideas or tricks that you have learned to get good results.:s0155:
 
I saw blocks of florist foam at the dollar store the other day - more economical than going to Michael's or some other craft store. I've been told that you can take some modeling clay in a framework, spray the gun / part you want to mold with mold release and imbed it 1/2 way into the clay , use a dowel to make indexing marks, spray the mold release again just to be safe, and coat the entire thing until its 1/2 inch above the high point of the gun and let it cure. (note you want to put a dowel or ear plug, etc into the barrel and have it run to the edge of the mold so you can pour the casting epoxy into the mold) After the silicone cures you flip the mold over and peel the modeling clay off of the part until the part and the mating surfaces of the silicone are free of clay. spray the now exposed side of the part and the mating mold surface with mold release and apply RTV silicone to this side and allow it to cure. once you release the gun or part from the mold you now can spray the mold halves with mold release, put the 2 pieces of the mold together and pour in your epoxy resin, fiberglass, or 2 part plasticast and allow it to cure and peel the mold off - you can repeat this many times as you need. A friend who works for a movie gun company said that's how the shop makes the dummy guns that are going to be tossed around or dropped when filming on the set and finish them up with an air brush.
 
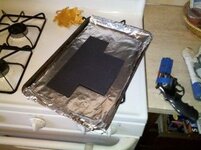
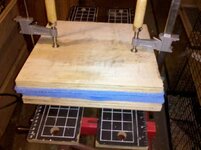
Well I don't think it turned out too bad for my first attempt at working with this stuff. I followed the processes I found on several different sites and just free styled the finishing touches. I found some camping pad for $3 at the Goodwill to make my press and had the plywood and clamps already. I know I should have used a toaster oven to do the heating but I figured a couple min. @350 degrees in the regular oven wouldn't hurt anything or smell too bad ( it also helped that the wife was at work ;) ). That along with a heat gun, jig saw and belt sander for the detail work and I think everything came out great with good retention. I had ordered two 1' square sheets of .80 kydex along with some grommets, and chicago screws from Knifekits.com. and I still have enough left to do another holster and maybe some mag carriers.
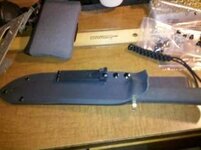
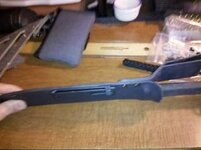
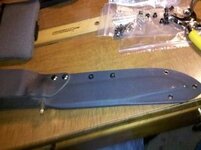
My first attempt was the sheath for my Trailmaster. I added a MOLLE clip to the front to attach a small personal survival kit and put a (not pictured) nylon strap with buckle on the bottom for lashing it to my leg. Everything worked out ok except I learned that I needed to wash everything out very well after sanding or suffer some scratches on the blade from sliding it in and out. Good thing it was already well used or I probably would have cried if it was a wall hanger knife.
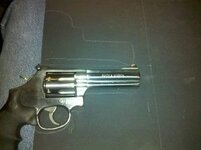
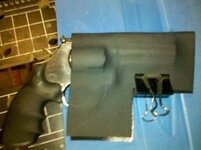
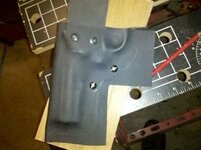
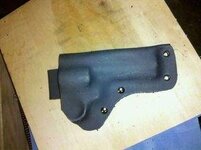
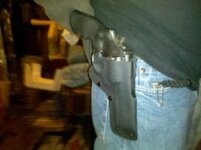
Second was a holster for my revolver. I am going to post some pics of the steps I took to make this one from beginning to end so it might carry on into two posts. I kinda came up with the design after looking at a few commercial models and figuring out what would take the least material. I taped a pencil along top of the gun between the sights to keep a channel when molding so things did not hang up on the draw. It took a bit more head scratching to figure out the best way to mount the belt loop and to get the retention right on this one. It all came together easier than I thought it would be and it feels and works nice with good balance on the belt.

IMG_20101218_170133-1.jpg

IMG_20101218_170145.jpg

IMG_20101218_170203.jpg

IMG_20101219_114450.jpg

IMG_20101219_120130.jpg
 

Upcoming Events

Redmond Gun Show
Redmond, OR
Klamath Falls gun show
Klamath Falls, OR
Centralia Gun Show
Centralia, WA

New Resource Reviews

New Classified Ads

Back Top