Diamond Lifetime
- Messages
- 6,124
- Reactions
- 13,918
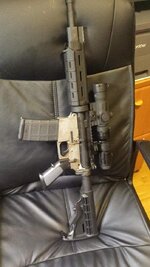
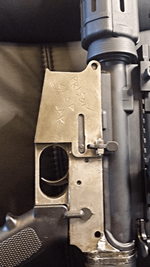
Its tacked together with TIG, Its solid enough now you could shoot it but I plan on doing a bit more.
So...
First off let me say this is a real project. Not that its super difficult but it will require considerable hand filing and fitting if its ever going to work well.
Ive got about 5 hours into this thing at this point, a better part of an hour of that was fitting the bolt catch. Getting the roll pin hole located and drilled takes some effort and then I had to ream out the plunger hole and build a spacer to go behind the spring to get the tension right.
A few observations on the kit/parts
The trigger, hammer pins holes as well as the safety hole are oversize from the get go. They will work but it would have been nice if they would have laser cut them 15 thou under so you could ream them to actual size.
The parts are "close" and you have to be a bit careful what you use as a reference to aline the parts. I found that if you just stacked the parts up and lined up one side that they might not be where they actually belong.
I dont think its practical to try and do factory style detents. There is not even meat for you to do a safety detent (the spot on the safety where the detent goes is just floating in open space inside the receiver. I think you would have to fabricate a little captured spring & ball detent and tack it in the bottom of the fcg cavity.
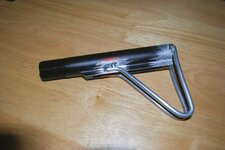
For doing the buffer tube threads I think what I am going to do is tack a castle nut on and use it as a thread guide. I ordered a used tap of eBay too but like yours its a bottom tap so getting it started straight will be challanging.
If I was to do this over, I would come up with a stripped upper to use for fixturing. I had a built upper but its not handy. I would also plan on having a dedicated upper for this thing because it might be easier to do some fitting to the upper to make assembly easier.
Ok. So at this point it looks kind of like a lower.
As it sits the mag catch wont work. It can be made to work by either filing away some meat on the latch arm or tacking a little chunk on the bit that catches the mag. It took some time to file the mag button hole enough to even try to put it together. My pistol grip wont quite work, I drilled the mounting hole about 3/32" too far towards the RE so there is a gap between the trigger guard and the grip. I can fix it easily by slotting the hole in the grip. The pivot hole I got jacked up. Remember earlier when I said just sticking the parts on a flat surface on one side to line them up might not work? I alined them on the top edge and the pivot pin hole is lower on one side so the pin is angled enough it wont pin to the upper. Again its not that big of a deal. With a dedicated upper you could just ream the takedown hole with the lower in place and Bob's your uncle.
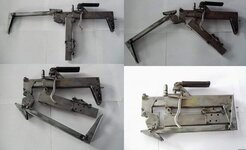
The point I am getting at is you likely will have a actual built rifle if you build an AR out of one of these. If you machine a 80% lower even poorly all the mil-spec parts still are going to all drop right in and work. With this flat set you are getting something that is roughly the shape of a lower and some fitting of both parts and it is going to be required. Actually it might require the fabrication of from scratch parts. There needs to be someway to locate the safety so building some kind of detent system. Probably easiest to fabricate self retained takedown and pivot pins as well. I got about 5 hours into what you see, I am doing it in a metal shop with real equipment so take that into consideration too. I would guess that I would have at least another 10 hours into getting this thing up to snuff. Without all the equipment I have I could see this taking 20+ hours to get it all hand fit
Its going to be a while before I get back to this. In the mean time I am going to look for some real low budget upper parts with the intent of coming up with some parts dedicated to this rifle. Doing this gives me a lot of respect for those guys who built the shovel AK's


